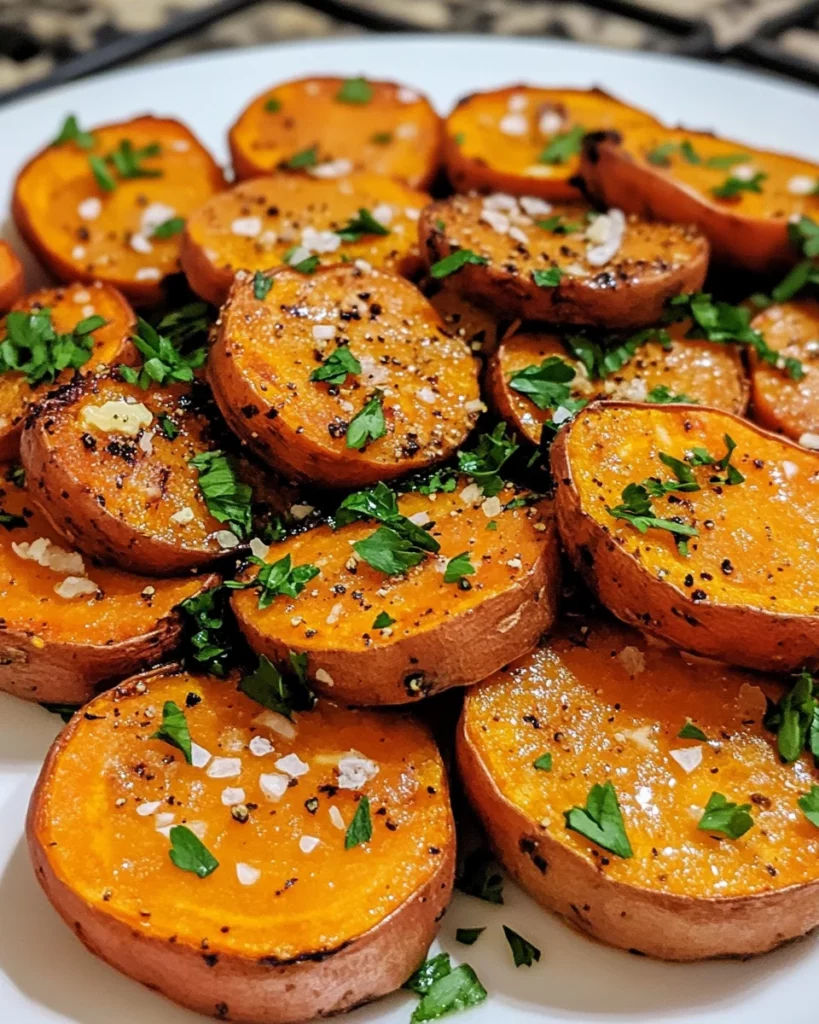
Sweet potato bliss bites will delight your taste buds!

Introduction to Sweet Potato Bliss Bites
Hey there, fellow food lovers! If you’re anything like me, you’re always on the lookout for quick, delicious snacks that can brighten up your busy day. That’s where these sweet potato bliss bites come in! They’re not just a treat for your taste buds; they’re also a healthy option that even the pickiest eaters will adore. Imagine a snack that’s easy to whip up, packed with flavor, and perfect for sharing with loved ones. Trust me, once you try these bites, they’ll become a staple in your kitchen!
Why You’ll Love This Sweet Potato Bliss Bites
These sweet potato bliss bites are a game-changer for busy moms and professionals alike. They’re incredibly easy to make, taking just over an hour from start to finish. Plus, they’re packed with nutrients, making them a guilt-free snack option. The delightful combination of flavors will have your family asking for more. Whether you need a quick bite or a dish to impress, these bites are sure to please!
Ingredients for Sweet Potato Bliss Bites
Let’s dive into the ingredients that make these sweet potato bliss bites so special! Each component plays a vital role in creating that perfect balance of flavor and texture. Here’s what you’ll need:
- Sweet Potatoes: The star of the show! They provide natural sweetness and a creamy texture.
- Olive Oil: This adds richness and helps achieve that golden-brown exterior. You can also use avocado oil for a different flavor.
- Sea Salt: A must for enhancing the natural flavors of the sweet potatoes.
- Black Pepper: Just a pinch adds a nice kick to the bites.
- Garlic Powder (optional): For those who love a savory touch, this adds depth to the flavor.
- Smoked Paprika (optional): This gives a subtle smokiness that elevates the taste profile.
- Greek Yogurt (optional): A creamy topping that pairs beautifully with the bites, adding a tangy contrast.
- Crumbled Feta (optional): For a burst of salty flavor, feta cheese is a delightful addition.
- Chopped Chives (optional): These add a fresh, oniony flavor that brightens up the bites.
- Nut Butter (optional): For a sweet twist, try drizzling almond or peanut butter on top!
Feel free to mix and match these ingredients based on your preferences. The exact quantities are listed at the bottom of the article for easy printing. Happy cooking!
How to Make Sweet Potato Bliss Bites
Now that we have our ingredients ready, let’s get cooking! Making sweet potato bliss bites is a straightforward process that anyone can master. Follow these simple steps, and you’ll have a delicious snack in no time!
Step 1: Preheat the Oven
First things first, preheat your oven to 425°F (220°C). Preheating is crucial because it ensures even cooking. You want those sweet potatoes to bake perfectly, so don’t skip this step!
Step 2: Prepare the Sweet Potatoes
Next, grab your sweet potatoes and poke holes in them with a fork. This allows steam to escape while they bake. Then, rub each potato with olive oil. This step not only adds flavor but also helps achieve that lovely, crispy skin.
Step 3: Bake the Sweet Potatoes
Place the sweet potatoes on a baking sheet and pop them in the oven. Bake for 45-60 minutes until they’re tender. To check for doneness, simply insert a fork. If it goes in easily, they’re ready!
Step 4: Mash the Sweet Potatoes
Once the sweet potatoes are cool enough to handle, scoop out the insides into a mixing bowl. Mash them until they’re smooth and creamy. You want a texture that’s easy to shape into bites, so take your time here!
Step 5: Season the Mixture
Now comes the fun part—seasoning! Mix in olive oil, sea salt, black pepper, and any optional spices you like. This is your chance to customize the flavor. Don’t be shy; taste as you go!
Step 6: Form the Bites
With your seasoned mixture ready, it’s time to shape the bites. Use your hands to form small balls or patties. Aim for a size that’s easy to pop in your mouth. Remember, the more uniform they are, the better they’ll cook!
Step 7: Bake the Bites
Finally, preheat your oven to 400°F (200°C) and line a baking sheet with parchment paper. Place your formed bites on the sheet and bake for 20-25 minutes. You want them golden brown and slightly crispy. Keep an eye on them; they’ll be irresistible!
Tips for Success
- Make sure to poke enough holes in the sweet potatoes to prevent them from bursting.
- For extra creaminess, add a splash of milk or a dollop of Greek yogurt when mashing.
- Experiment with different spices to find your favorite flavor combination.
- Use a cookie scoop for uniform bites that cook evenly.
- Let the bites cool slightly before serving for the best texture.
Equipment Needed
- Baking Sheet: A standard baking sheet works well, but a cast-iron skillet can add a nice touch.
- Parchment Paper: This helps prevent sticking; aluminum foil is a good alternative.
- Mixing Bowl: Any large bowl will do; a stand mixer can save time.
- Fork: Essential for poking holes and mashing; a potato masher is also handy.
Variations
- Spicy Bliss Bites: Add a pinch of cayenne pepper or red pepper flakes for a kick!
- Herbed Delight: Mix in fresh herbs like rosemary or thyme for an aromatic twist.
- Cheesy Bites: Incorporate shredded cheese like cheddar or mozzarella into the mixture for extra flavor.
- Sweet Version: Add a drizzle of honey or maple syrup for a sweeter snack option.
- Gluten-Free: These bites are naturally gluten-free, making them perfect for those with dietary restrictions.
Serving Suggestions
- Pair your sweet potato bliss bites with a refreshing green salad for a balanced meal.
- Serve with a side of tangy Greek yogurt for dipping; it complements the sweetness perfectly.
- For a fun twist, try them with a drizzle of honey or maple syrup.
- Garnish with fresh chives or parsley for a pop of color.
FAQs about Sweet Potato Bliss Bites
As I’ve shared my love for sweet potato bliss bites, I know you might have a few questions. Here are some common queries that can help you make the most of this delightful recipe!
Can I make sweet potato bliss bites ahead of time?
Absolutely! You can prepare the mixture and form the bites a day in advance. Just store them in the fridge until you’re ready to bake. This makes for a quick snack option on busy days!
What can I use instead of sweet potatoes?
If you’re looking for alternatives, mashed butternut squash or pumpkin can work well. They’ll give you a similar texture and flavor profile, making them a great substitute!
How do I store leftovers?
Leftover sweet potato bliss bites can be stored in an airtight container in the refrigerator for up to three days. Just reheat them in the oven for a few minutes to regain that crispy texture!
Can I freeze sweet potato bliss bites?
Yes, you can freeze them! Just place the uncooked bites on a baking sheet to freeze individually, then transfer them to a freezer bag. Bake from frozen, adding a few extra minutes to the cooking time.
What are some good dipping sauces for these bites?
These bites pair wonderfully with a variety of dips! Try them with Greek yogurt, hummus, or even a spicy sriracha sauce for a flavor explosion. The options are endless!
Final Thoughts
Creating sweet potato bliss bites is more than just cooking; it’s about bringing joy to your kitchen and your family. The delightful aroma that fills your home while they bake is simply irresistible. These bites are not only a healthy snack but also a canvas for your creativity. Whether you enjoy them as a quick pick-me-up or a fun appetizer, they’re sure to become a favorite. So, roll up your sleeves, gather your loved ones, and dive into this delicious adventure. Trust me, once you taste these bites, you’ll be hooked!
Print
Sweet potato bliss bites
- Diet: Gluten Free
Description
Hey there, fellow food lovers! If you’re anything like me, you’re always on the lookout for quick, delicious snacks that can brighten up your busy day. That’s where these sweet potato bliss bites come in! They’re not just a treat for your taste buds; they’re also a healthy option that even the pickiest eaters will adore. Imagine a snack that’s easy to whip up, packed with flavor, and perfect for sharing with loved ones. Trust me, once you try these bites, they’ll become a staple in your kitchen!
Ingredients
-
-
- Sweet Potatoes: The star of the show! They provide natural sweetness and a creamy texture.
-
- Olive Oil: This adds richness and helps achieve that golden-brown exterior. You can also use avocado oil for a different flavor.
-
- Sea Salt: A must for enhancing the natural flavors of the sweet potatoes.
-
- Black Pepper: Just a pinch adds a nice kick to the bites.
-
- Garlic Powder (optional): For those who love a savory touch, this adds depth to the flavor.
-
- Smoked Paprika (optional): This gives a subtle smokiness that elevates the taste profile.
-
- Greek Yogurt (optional): A creamy topping that pairs beautifully with the bites, adding a tangy contrast.
-
- Crumbled Feta (optional): For a burst of salty flavor, feta cheese is a delightful addition.
-
- Chopped Chives (optional): These add a fresh, oniony flavor that brightens up the bites.
-
- Nut Butter (optional): For a sweet twist, try drizzling almond or peanut butter on top!
-
Instructions
Step 1: Preheat the Oven
First things first, preheat your oven to 425°F (220°C). Preheating is crucial because it ensures even cooking. You want those sweet potatoes to bake perfectly, so don’t skip this step!
Step 2: Prepare the Sweet Potatoes
Next, grab your sweet potatoes and poke holes in them with a fork. This allows steam to escape while they bake. Then, rub each potato with olive oil. This step not only adds flavor but also helps achieve that lovely, crispy skin.
Step 3: Bake the Sweet Potatoes
Place the sweet potatoes on a baking sheet and pop them in the oven. Bake for 45-60 minutes until they’re tender. To check for doneness, simply insert a fork. If it goes in easily, they’re ready!
Step 4: Mash the Sweet Potatoes
Once the sweet potatoes are cool enough to handle, scoop out the insides into a mixing bowl. Mash them until they’re smooth and creamy. You want a texture that’s easy to shape into bites, so take your time here!
Step 5: Season the Mixture
Now comes the fun part—seasoning! Mix in olive oil, sea salt, black pepper, and any optional spices you like. This is your chance to customize the flavor. Don’t be shy; taste as you go!
Step 6: Form the Bites
With your seasoned mixture ready, it’s time to shape the bites. Use your hands to form small balls or patties. Aim for a size that’s easy to pop in your mouth. Remember, the more uniform they are, the better they’ll cook!
Step 7: Bake the Bites
Finally, preheat your oven to 400°F (200°C) and line a baking sheet with parchment paper. Place your formed bites on the sheet and bake for 20-25 minutes. You want them golden brown and slightly crispy. Keep an eye on them; they’ll be irresistible!