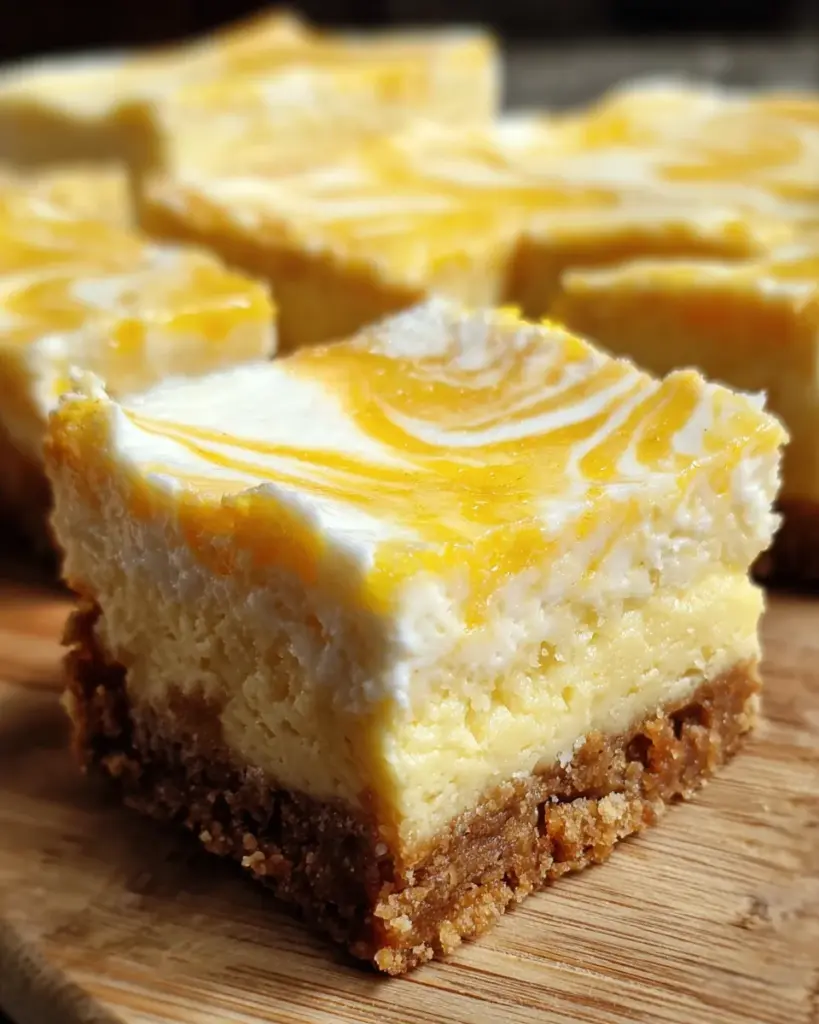
Swirled lemon cheesecake bars that delight every bite!

Introduction to Swirled Lemon Cheesecake Bars
Hello, fellow culinary adventurers! If you’re anything like me, you know how hectic life can get, especially as a busy mom or professional. We crave delicious desserts, but finding the time to whip one up can feel overwhelming. That’s where these swirled lemon cheesecake bars come to the rescue! They’re not just a treat; they’re a bright spark of sunshine that can elevate any ordinary day. Imagine the delight on your loved ones’ faces as they indulge in these creamy, zesty bars. Trust me; these are perfect for any occasion or just because!
Why You’ll Love This Swirled Lemon Cheesecake Bars
Let’s be honest—who doesn’t love a dessert that’s easy to make yet tastes like a gourmet creation? These swirled lemon cheesecake bars are a fantastic solution for busy days. They come together in just over half an hour, allowing you to savor the deliciousness without spending all day in the kitchen. Plus, the delightful lemon flavor adds a refreshing touch that will have everyone asking for seconds!
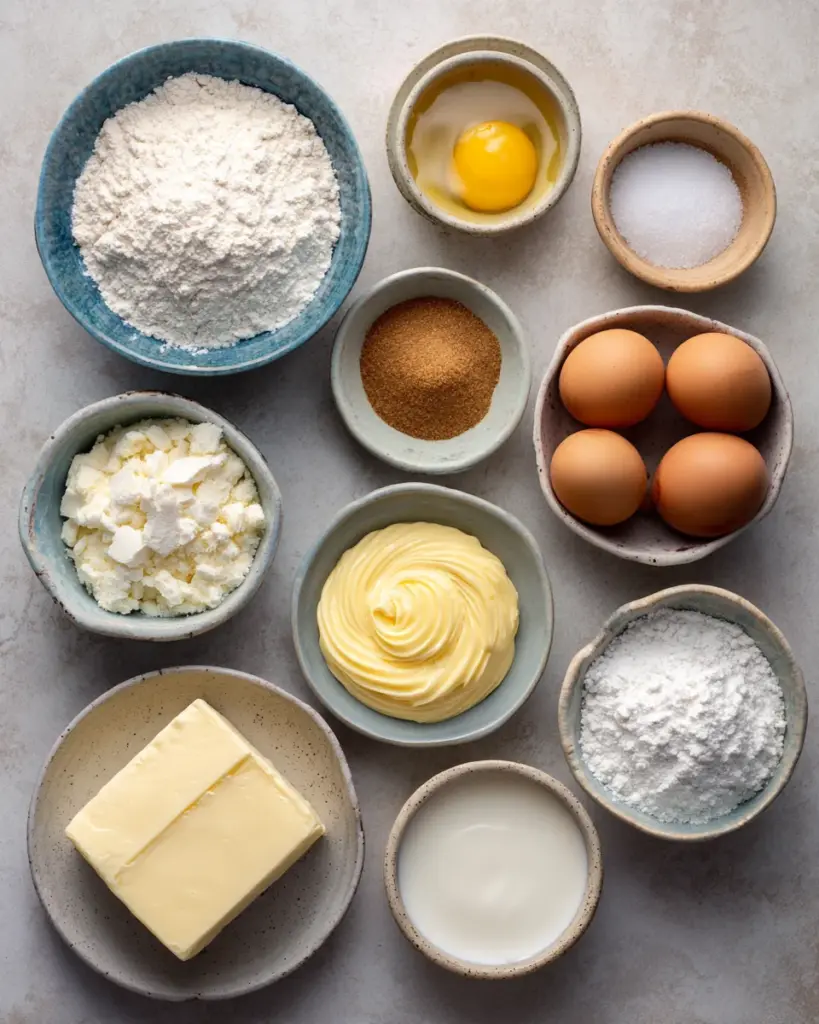
Ingredients for Swirled Lemon Cheesecake Bars
Creating these delightful swirled lemon cheesecake bars starts with gathering the right ingredients. Here’s what you’ll need:
- All-Purpose Flour: This forms the base of your crust, providing the right structure.
- Light Brown Sugar: Adds a touch of sweetness and a warm, caramel flavor to the crust.
- Salt: Enhances the sweetness, balancing the flavors in this dessert.
- Unsalted Butter: Brings richness to your crust; make sure it’s melted for easy mixing.
For the luscious filling, you will need:
- Cream Cheese: Softened at room temperature, it gives your bars that creamy texture you’ll love.
- Granulated Sugar: Sweetens the filling beautifully and helps create a smooth consistency.
- Lemon Zest: This ingredient adds that zesty kick of flavor we crave in lemon desserts.
- Egg: Acts as a binder, giving your cheesecake filling structure and creaminess.
- Plain Full-Fat Yogurt: Adds a subtle tanginess and creaminess to your filling.
- Pure Vanilla Extract: Enhances all the flavors and adds warmth to your dessert.
Finally, to create the beautiful lemon curd swirl:
- Small Batch Lemon Curd: Homemade or store-bought, this provides that irresistible tangy swirl.
All the quantities for these ingredients can be found at the bottom of the article, where you can print them for easy reference. Happy baking!
How to Make Swirled Lemon Cheesecake Bars
Ready to whip up these delightful swirled lemon cheesecake bars? Let’s dive into the step-by-step process that will guide you through creating these heavenly treats. Gather your ingredients, roll up your sleeves, and let’s get started!
Step 1: Prepare Your Ingredients
Before you do anything, ensure all your ingredients are at room temperature. This makes mixing easier and results in a creamier texture.
Step 2: Preheat the Oven
Set your oven to 350°F (175°C). This preheating step is crucial for achieving that golden crust that we all love.
Step 3: Make the Crust
In a medium bowl, combine the all-purpose flour, light brown sugar, and salt. Stir until there are no lumps. Then, pour in the melted butter and mix until everything resembles damp sand. Press this mixture evenly into the bottom of your prepared 8×8-inch pan. Bake for 10-12 minutes, or until the crust turns lightly golden. Let it cool slightly while you prepare the filling.
Step 4: Create the Cheesecake Filling
Lower your oven temperature to 325°F (163°C) now—this is important for a perfect bake! In a clean medium bowl, beat the softened cream cheese with an electric mixer until smooth. Add the granulated sugar and lemon zest, and continue mixing until well combined. Then, beat in the egg, making sure it’s fully integrated. Finally, fold in the yogurt and vanilla extract for that creamy goodness!
Step 5: Swirl in Lemon Curd
Pour your luscious cheesecake filling over the cooled crust, spreading it evenly. Now comes the fun part: dollop teaspoons of chilled lemon curd sporadically over the surface. Using a butter knife, gently swirl the curd through the filling. This creates those beautiful marbled patterns we adore.
Step 6: Bake the Cheesecake Bars
Place the pan in your preheated oven and bake for 20-25 minutes. You’ll know it’s ready when the edges are set, and the center has a slight wobble. Keep an eye on it; we want the perfect texture!
Step 7: Cool and Refrigerate
After baking, remove your bars from the oven and let them cool completely on a wire rack. This step is key to ensuring a great texture. Once cooled, pop them in the fridge for at least 2 hours. Chilling helps the flavors meld and sets the cheesecake perfectly!
Tips for Success
- Use room temperature cream cheese for easier mixing and a smoother filling.
- Chill your lemon curd well to enhance the swirling effect in your cheesecake bars.
- Don’t overmix the filling; just blend until combined to avoid a dense texture.
- Allow the bars to cool completely before refrigerating for the best results.
- Adjust the sweetness to your taste by adding more or less sugar.
Equipment Needed
- 8×8-inch Baking Pan: Use a metal or glass pan; both work well.
- Mixing Bowls: Medium-sized bowls are perfect for mixing your crust and filling.
- Electric Mixer: A hand mixer makes it easy to achieve a smooth filling.
- Rubber Spatula: Ideal for scraping down sides and spreading the filling.
- Wire Rack: Essential for cooling your cheesecake bars evenly.
Variations
- Chocolate Swirl: Add a dollop of chocolate ganache instead of lemon curd for a decadent twist.
- Berry Bliss: Swap in berry compote for the lemon curd to create a mixed berry swirl.
- Gluten-Free Option: Use almond flour or a gluten-free flour blend for the crust.
- Vegan Alternative: Substitute cream cheese with vegan cream cheese and the egg with a flax egg for a plant-based version.
- Nutty Crunch: Add crushed nuts like pecans or almonds to the crust for added texture.
Serving Suggestions
- Pair with Fresh Fruit: Serve alongside sliced strawberries or blueberries for a refreshing contrast.
- Invite a Sip: Complement with a glass of iced tea or lemon-infused water to enhance the citrus vibe.
- Presentation: Dust with powdered sugar or garnish with lemon zest for a beautiful presentation.
- Chill Out: Serve these bars chilled for the best flavor and texture experience.
FAQs about Swirled Lemon Cheesecake Bars
Can I make these swirled lemon cheesecake bars ahead of time?
Absolutely! In fact, these bars taste even better after chilling overnight. Make them the day before your event, and you’ll have a delightful dessert that’s ready to impress.
Is there a way to reduce the sugar in this recipe?
Yes! You can adjust the granulated sugar in the filling to your taste. Just know that this may alter the texture slightly, but it will still be delicious!
How should I store leftover cheesecake bars?
Store your swirled lemon cheesecake bars in an airtight container in the refrigerator. They’ll keep well for up to a week—but I doubt they’ll last that long!
Can I freeze these cheesecake bars?
Yes, you can! Just wrap the bars tightly in plastic wrap and then foil to prevent freezer burn. They should freeze well for up to three months. Thaw them overnight in the refrigerator before serving.
What can I use instead of lemon curd for the swirl?
If lemon curd isn’t available, feel free to use fruit preserves or even peanut butter for a fun twist. It won’t be quite the same, but it will create a lovely flavor contrast!
Final Thoughts
Making swirled lemon cheesecake bars is not just about baking; it’s about creating moments that bring joy to our busy lives. The process is surprisingly easy, and the delightful flavors will transport you to a sunny afternoon, no matter the weather outside. Each bite is a refreshing reminder of the sweeter things in life. I love serving these bars at gatherings, watching everyone enjoy them with smiles. Whether you’re treating yourself or sharing with loved ones, these bars promise to spread happiness. So gather your ingredients and let the baking adventure begin—trust me, it’s worth every moment!
Print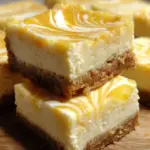
Swirled lemon cheesecake bars
- Total Time: 2 hours 55 minutes
- Yield: 16 bars 1x
- Diet: Vegetarian
Description
Delicious swirled lemon cheesecake bars that are perfect for dessert lovers.
Ingredients
- Crust
- ¾ cup (105g) all-purpose flour
- ¼ cup (55g) packed light brown sugar
- ¼ teaspoon salt
- ¼ cup (56g) unsalted butter, melted
- Filling
- 1 block (250g) cream cheese, softened
- ⅓ cup (65g) granulated sugar
- 2 teaspoons lemon zest
- 1 large egg
- ¼ cup (60ml) plain full-fat yogurt
- 1 teaspoon (5ml) pure vanilla extract
- Lemon curd swirl
- 1 batch of Small Batch Lemon Curd
Instructions
- Preheat oven to 350°F (175°C). Line an 8×8-inch square metal baking pan with foil, leaving a 2-inch overhang along the sides.
- Make the Small Batch Lemon Curd and chill it in the fridge until thoroughly set.
- In a medium bowl, combine flour, brown sugar, and salt until no lumps remain. Add melted butter and mix until the texture resembles damp sand. Press evenly into the bottom of the prepared pan and bake for 10-12 minutes until lightly golden. Cool slightly.
- Lower the oven temperature to 325°F (163°C).
- In a medium bowl, beat cream cheese until smooth. Add sugar and lemon zest, continuing to beat until smooth with an electric hand mixer. Beat in the egg until fully incorporated, then mix in yogurt and vanilla extract. Pour the filling over the crust and spread evenly.
- Dollop teaspoons of chilled lemon curd over the surface of the cheesecake filling. Use a butter knife to swirl the curd through the filling.
- Bake for 20-25 minutes until the edges are set and the center has a slight wobble. Remove from the oven and cool completely on a wire rack.
- Refrigerate the cheesecake for at least 2 hours before slicing into bars. Serve and enjoy.
Notes
- Ensure the cream cheese is softened to room temperature for easy mixing.
- Chilling the cheesecake is important for achieving the right texture before serving.
- Feel free to adjust the sweetness by modifying the sugar amounts.
- Prep Time: 20 minutes
- Cook Time: 35 minutes
- Category: Dessert
- Method: Baking
- Cuisine: American
Nutrition
- Serving Size: 1 bar
- Calories: 180
- Sugar: 12g
- Sodium: 150mg
- Fat: 8g
- Saturated Fat: 4g
- Unsaturated Fat: 3g
- Trans Fat: 0g
- Carbohydrates: 22g
- Fiber: 1g
- Protein: 3g
- Cholesterol: 30mg