Fruity Pebbles Rice Krispie Treats

Introduction to Fruity Pebbles Rice Krispie Treats
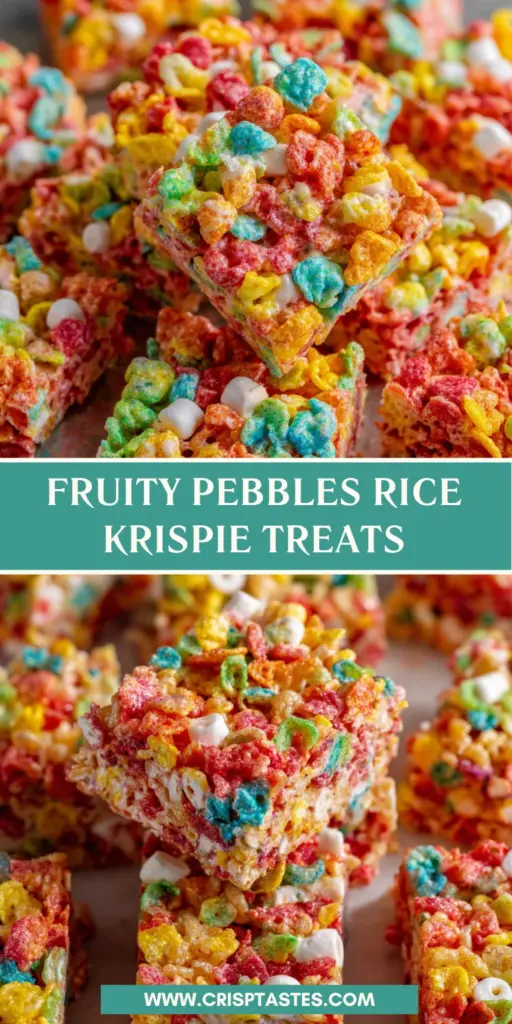
There’s something undeniably joyful about Fruity Pebbles Rice Krispie Treats. They catch the eye and tug at the heartstrings, reminding me of carefree childhood days. As a busy mom, I know how easy it can be to get overwhelmed in the kitchen, but this colorful treat is a delightful escape. It’s quick to make, needs just a few ingredients, and, best of all, it brings a sprinkle of happiness to any snack time. If you’re looking for a crowd-pleaser that dazzles both young and old, you’ve found your match with these delightful bars!
Why You’ll Love This Fruity Pebbles Rice Krispie Treats
These Fruity Pebbles Rice Krispie Treats are not just about eye-catching colors—they’re about simplicity, too! In about 30 minutes, you can whip up a batch that’s perfect for parties, lunchboxes, or a sweet snack at home. They’re incredibly forgiving, even if a little chaos happens during the process. Plus, who can resist that chewy texture and sweet, fruity flavor? It’s happiness in every bite!
Ingredients for Fruity Pebbles Rice Krispie Treats
Making these Fruity Pebbles Rice Krispie Treats is a breeze once you gather your ingredients. Here’s what you’ll need:
- Fruity Pebbles Cereal: This colorful cereal is the star of the show! Its fruity flavor and bright colors create a fun twist on classic treats.
- Salted Butter: It adds richness and helps bind everything together. If you only have unsalted butter, just boost your salt a tad!
- Mini Marshmallows: These little puffs melt beautifully, providing that gooey sweetness we love. You could also use regular marshmallows if that’s what you have on hand.
If you’re feeling adventurous, consider adding chocolate chips, sprinkles, or even dried fruits for extra texture and flavor. Search local stores or online for unique Fruity Pebbles flavors or colorful alternatives! You can find the exact measurements for these ingredients at the bottom of the article, ready for printing.
How to Make Fruity Pebbles Rice Krispie Treats
Now that we’ve gathered our delightful ingredients, let’s dive into the fun part: making these Fruity Pebbles Rice Krispie Treats! I promise, it’s as easy as pie—or should I say, treat? Let’s sparkle those kitchen counters with some deliciousness!
Step 1 – Prepare Your Ingredients
Start by pouring 5 cups of Fruity Pebbles cereal into a large mixing bowl. A colorful mound will greet you, igniting your excitement. Set this bowl aside for now. Then, lightly grease an 8×8-inch pan with nonstick spray or a swipe of butter. This will help your treats release easily later!
Step 2 – Melt the Butter and Marshmallows
In a medium saucepan, over low heat, melt 1/4 cup of salted butter. Keep an eye on it—burnt butter is no one’s friend! Once the butter is silky and melted, add in 4 cups of mini marshmallows. Stir constantly with a spatula, watching those marshmallows transform into a gooey wonder. This typically takes about 3–5 minutes, and it’s worth every second!
Step 3 – Combine the Cereal and Mixture
Now for the fun part! Immediately pour the melted marshmallow mixture over the Fruity Pebbles. Grab your rubber spatula, and gently mix until every piece of cereal is coated in melted sweetness. It’s delicious chaos, but be careful not to break the cereal too much. We want those treats to stay light and chewy!
Step 4 – Transfer to Pan
Carefully transfer your gooey mixture into the greased 8×8-inch pan. Use a piece of wax or parchment paper to press the mixture evenly into the pan. It’s important not to press too hard; we want to keep that airy texture. Just a nice, gentle press will do the trick!
Step 5 – Cool and Cut
Let your colorful masterpiece cool completely at room temperature, which should take about 20–30 minutes. If you’re in a hurry (and who isn’t?), pop the pan in the refrigerator for about 5 minutes. Once cooled, cut into 9 squares, and get ready to enjoy your Fruity Pebbles Rice Krispie Treats!
Tips for Success
- Use a large bowl for mixing; it’ll catch all the colorful cereal chaos!
- Make sure to grease your pan well to avoid sticky disasters.
- Don’t overheat the butter or marshmallows; keep it low and slow for the best texture.
- Feel free to add extra mix-ins like chocolate chips or sprinkles to customize your treats.
- Store in an airtight container to maintain freshness.
Equipment Needed
- Large Mixing Bowl: Any big bowl will do, even your favorite salad bowl!
- Medium Saucepan: A non-stick pan works best for melting the butter and marshmallows.
- Rubber Spatula: This helps you mix everything without damaging your cereal.
- 8×8-inch Pan: You can use any similar-sized dish; just ensure it’s greased well!
Variations for Fruity Pebbles Rice Krispie Treats
- Chocolate Lovers: Mix in some chocolate chips or drizzle melted chocolate on top for a chocolatey twist.
- Nutty Delight: Add chopped nuts like almonds or pecans for a satisfying crunch.
- Fruity Mix-ins: Incorporate dried fruits such as cranberries or raisins for a chewy texture.
- Colorful Sprinkles: Add a variety of sprinkles for extra fun and celebration vibes!
- Dairy-Free Option: Use dairy-free butter and mini marshmallows for a treat everyone can enjoy.
Serving Suggestions for Fruity Pebbles Rice Krispie Treats
- Pair these colorful treats with a tall glass of milk or a fruity smoothie for a delightful snack.
- Serve them at birthday parties or family gatherings for a splash of color and fun.
- Place them on a festive plate, and add some fresh fruit for a cheerful presentation.
FAQs about Fruity Pebbles Rice Krispie Treats
Can I use other cereals to make these treats?
Absolutely! While Fruity Pebbles are the star here, you can experiment with other cereals like Cocoa Krispies or even rice squares for a different flavor. Just keep the same proportions to ensure the right texture!
How do I store Fruity Pebbles Rice Krispie Treats?
To keep your treats fresh, store them in an airtight container at room temperature. They can last up to three days. If they last that long, they must be pretty amazing!
Can I make these treats ahead of time?
For sure! You can make them a day in advance for a party or event. Just remember to let them cool completely before wrapping them up to keep that gooey texture intact.
What if I don’t have mini marshmallows?
You can use standard-sized marshmallows! Simply cut them into smaller pieces before melting. They’ll work perfectly—you might even get a little more marshmallow goodness in each bite!
Can I add flavors to the marshmallows?
Definitely! Try adding a splash of vanilla extract or even some flavored extracts to give your marshmallows a fun twist. With a little creativity, your treats can become a fruity fiesta!
Final Thoughts
Creating these Fruity Pebbles Rice Krispie Treats isn’t just about making a sweet snack; it’s an experience filled with joy and nostalgia. Every bright bite brings back memories of childhood festivities, making them a perfect treat for my family. The simplicity of this recipe allows busy moms like us to bring color and excitement into everyday life. Whether for a fun dessert or a lunchtime surprise, these treats are bound to spark smiles. So, gather your family, enjoy the process, and let these colorful squares sprinkle some happiness into your day!
Print
Fruity Pebbles Rice Krispie Treats
- Total Time: 30 minutes
- Yield: 9 squares 1x
- Diet: Vegetarian
Description
Fruity Pebbles Rice Krispie Treats are a colorful and fun twist on the classic Rice Krispie treats, made with Fruity Pebbles cereal and mini marshmallows.
Ingredients
- 5 cups fruity pebble cereal
- 1/4 cup salted butter
- 4 cups mini marshmallows
Instructions
- Pour 5 cups fruity pebble cereal into a large mixing bowl. Set aside. Lightly grease an 8×8-inch pan with nonstick spray or butter.
- In a medium saucepan over low heat, melt 1/4 cup salted butter. Once melted, add 4 cups mini marshmallows. Stir constantly until the marshmallows are fully melted and the mixture is smooth, about 3–5 minutes.
- Immediately pour the melted marshmallow mixture over the cereal. Stir with a rubber spatula until the cereal is evenly coated.
- Transfer the mixture to the prepared 8×8-inch pan. Using a piece of wax or parchment paper, press the mixture evenly into the pan. Be careful not to press too hard to keep the treats light and chewy.
- Allow the treats to cool completely at room temperature, about 20–30 minutes. For faster cooling, place the pan in the refrigerator for about 5 minutes.
- Once cooled, cut into 9 squares and serve.
Notes
- For a different texture, consider adding additional mix-ins like chocolate chips or sprinkles.
- Store leftovers in an airtight container at room temperature for up to 3 days.
- Prep Time: 10 minutes
- Cook Time: 5 minutes
- Category: Dessert
- Method: Stovetop
- Cuisine: American
Nutrition
- Serving Size: 1 square
- Calories: 130
- Sugar: 10g
- Sodium: 55mg
- Fat: 5g
- Saturated Fat: 3g
- Unsaturated Fat: 2g
- Trans Fat: 0g
- Carbohydrates: 18g
- Fiber: 0g
- Protein: 1g
- Cholesterol: 15mg