Homemade Brookies: Discover This Irresistible Recipe!

Introduction to Homemade Brookies
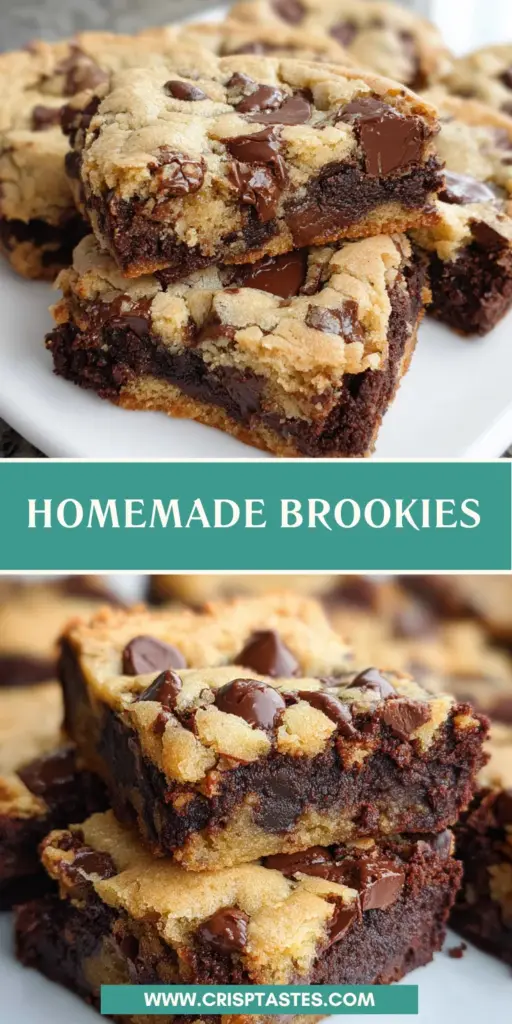
Welcome to the delightful world of homemade brookies! If you’re like me, you know how hectic life can be. With busy schedules, it’s easy to overlook that special treat for your loved ones. That’s where brookies come in! These divine creations combine the best of both cookies and brownies into one irresistible dessert. Not only are they a crowd-pleaser, but they also let you indulge in two favorites without the fuss of choosing. Grab your mixing bowl, and let’s dive into this luscious recipe that will surely become a family favorite!
Why You’ll Love This Homemade Brookies
Homemade brookies are a busy mom’s dream! They come together easily, allowing you to whip up something fabulous in no time. With the perfect blend of chewy cookies and fudgy brownies, each bite offers a delightful taste sensation. Plus, you don’t have to worry about picky eaters—everyone loves the magic of brookies! This recipe is sure to bring smiles to your kitchen table and make lasting memories with your loved ones.
Ingredients for Homemade Brookies
Gathering the right ingredients is half the fun when making homemade brookies! Here’s what you need for this delectable treat:
- Unsalted Butter: A key ingredient, giving both the brownie and cookie layers a rich flavor. Make sure it’s softened for easy mixing.
- Light Brown Sugar: This adds moisture and a slight caramel flavor, creating a delightful chewiness.
- Granulated Sugar: Sweetness is essential! It balances the flavors and aids in browning for that perfect texture.
- Eggs: These bind the ingredients together, lending structure to your brookies.
- Pure Vanilla Extract: A splash of vanilla enhances the overall taste, giving your dessert that warm, inviting aroma.
- All-Purpose Flour: This forms the base for both layers, providing the necessary sturdiness.
- Cocoa Powder: In the brownie layer, it delivers that rich chocolate flavor we all crave. Sifting it helps avoid clumps!
- Baking Soda and Baking Powder: Both act as leavening agents, ensuring your brookies rise beautifully.
- Salt: A touch of salt elevates sweetness and balances the flavors, making each bite even better.
- Chocolate Chips: These goodies melt delightfully and add extra chocolatey goodness throughout the cookie layer.
- Dark Chocolate: Melted and swirled into the brownie mixture, it deepens the overall chocolate flavor.
- Nuts (optional): For a satisfying crunch and nutty flavor, consider adding your favorite nuts to the brownie layer.
For precise measurements, check the end of this article for a printable recipe card. Enjoy the process of bringing all these wonderful ingredients together!
How to Make Homemade Brookies
Ready to embark on a delightful baking adventure? Making homemade brookies is easier than you might think! Follow these simple steps, and you’ll be savoring the sweet-smelling aroma of your creation in no time. Let’s get started!
Step 1: Prepare Your Baking Pan
Begin by preheating your oven to 350°F. Grab a 9×13-inch pan and give it a good greasing. Line the bottom and sides with parchment paper. This will prevent your brookies from sticking, making it easier to lift them out later. Who wants to battle with a sticky pan? Not me!
Step 2: Make the Cookie Dough
In a mixing bowl, combine softened unsalted butter with light brown and granulated sugar. Beat on medium until the mixture is creamy and well-combined, which should take about 2-3 minutes. Next, add in the egg, egg yolk, and vanilla extract. Beat until everything is incorporated. The aroma will make you smile!
In another bowl, whisk together all-purpose flour, salt, and baking soda. Gradually add this dry mix to your creamy butter mixture. Mix on low speed until a dough forms. Just when it starts to thicken, toss in those delightful chocolate chips. We want chocolate in every bite, right?
Step 3: Prepare the Brownie Batter
Now, it’s brownie time! Chop dark chocolate into smaller pieces and melt it in a microwave-safe bowl. Heat for about 2 minutes at 50% power, stirring occasionally until smooth. Let it cool while you grab another bowl.
In this new bowl, melt some more unsalted butter and mix with granulated sugar until well blended. Add eggs and egg yolk and beat at a higher speed for a fluffy batter. Then, fold in your cooled melted chocolate and pure vanilla extract. Those rich flavors are coming together beautifully!
In a third bowl, whisk together the dry ingredients: all-purpose flour, cocoa powder, salt, and baking powder. Gradually add this to the chocolate mixture. Remember, don’t overmix! We want a fudgy texture in our brownies.
Step 4: Combine Cookie and Brownie Layers
Now comes the fun part! Pour the brownie batter into your prepared pan, creating a smooth even layer. With your hands or a spoon, take large pieces of the cookie dough and flatten them. Gently press these pieces into the brownie layer. It’s like creating a cookie patch on top of your brownies! Repeat with the remaining cookie dough until it’s all used up.
Step 5: Bake to Perfection
Time to bake! Slide your pan into the preheated oven and bake for 35-40 minutes. After about 15-20 minutes, cover it with aluminum foil to prevent excessive browning. To check for doneness, insert a toothpick. It should come out slightly fudgy, not wet. Once baked, let it cool before cutting into decadent squares.
Tips for Success
- Ensure all ingredients are at room temperature for better consistency.
- Use quality chocolate for rich flavor in both brownie and cookie layers.
- Don’t overmix the brownie batter; it should be just combined for a fudgy texture.
- For cleaner cuts, let brookies cool completely before slicing.
- Store leftovers in an airtight container to maintain freshness.
Equipment Needed
- Mixing Bowls: A set of medium and large bowls will do the trick!
- Electric Mixer: A hand mixer is great, but a whisk works too if you’re feeling adventurous!
- Measuring Cups and Spoons: Essential for accuracy.
- Baking Pan: A 9×13-inch pan is perfect, but any similar size will work.
- Parchment Paper: For easy removal, but if you’re out, grease the pan well!
Variations on Homemade Brookies
- Nutty Brookies: Add chopped walnuts or pecans to the brownie layer for a crunchy twist.
- Peanut Butter Swirl: Swirl in some creamy peanut butter into the brownie layer before baking for a rich flavor boost.
- Gluten-Free Brookies: Substitute all-purpose flour with a 1:1 gluten-free flour blend for a delicious alternative.
- Mint Chocolate Brookies: Use mint chocolate chips in place of regular ones for a refreshing minty finish.
- Dairy-Free Brookies: Swap in coconut oil and dairy-free chocolate chips for a vegan-friendly treat.
Serving Suggestions for Homemade Brookies
- Warm with Ice Cream: Serve your brookies warm with a scoop of vanilla ice cream for a decadent dessert experience.
- Garnish with Whipped Cream: A dollop of whipped cream adds a delightful touch.
- Drizzle with Caramel: A drizzle of caramel sauce enhances the sweet flavor.
- Pair with Coffee: Enjoy brookies alongside a rich cup of coffee for a perfect afternoon treat.
FAQs about Homemade Brookies
As I share my favorite homemade brookies recipe, I realize you might have some burning questions. Let’s dive into the most common queries I get about these delightful treats!
Can I make homemade brookies in advance?
Absolutely! You can prepare the batter and store it in the fridge for up to two days. When you’re ready, simply bake them following the usual instructions. Freshly baked homemade brookies await!
How do I store homemade brookies?
Keep any leftovers in an airtight container at room temperature for up to three days. If you desire a longer shelf life, consider freezing them in a sealed container for up to three months.
Can I add other mix-ins to my brookies?
What makes homemade brookies chewy?
The combination of butter, brown sugar, and plenty of eggs contributes to that perfect chewy texture. These ingredients work together to create delicious layers that melt in your mouth.
Can I use different types of chocolate?
Yes, you can! Use milk chocolate, dark chocolate, or even white chocolate chips depending on your preference. Each variation will bring a different flavor profile to your homemade brookies!
Final Thoughts on Homemade Brookies
Creating homemade brookies is truly a rewarding experience that brings joy to my kitchen and heart. With their luscious layers of chewy cookie and fudgy brownie, these delights can brighten any day. They are perfect for family gatherings, celebrations, or simply indulging after a long week. Watching loved ones enjoy these treats warms my heart. As you embark on your bakers’ journey, I hope these brookies inspire smiles and shared moments. So, gather your ingredients, indulge in this sweet adventure, and enjoy the scrumptious happiness that only homemade brookies can bring!
Print
Homemade Brookies
- Total Time: 1 hour 10 minutes
- Yield: 12–16 servings 1x
- Diet: Vegetarian
Description
Indulge in the rich and delicious combination of cookies and brownies with this homemade brookies recipe.
Ingredients
- ¾ cup (170g) unsalted butter, softened
- ¾ cup (165g) packed light brown sugar
- ¼ cup + 2 tablespoons (60g) granulated sugar
- 1 large egg
- 1 large egg yolk
- 1 tablespoon (15ml) pure vanilla extract
- 1 ¾ cups + 2 tablespoons (254g) all-purpose flour
- ¾ teaspoon salt
- ¼ + 1/8 teaspoon baking soda
- 1 cup (180g) chocolate chips
- 6 ounces dark chocolate, melted
- ¾ cup (170g) unsalted butter, melted
- 1 ½ cups (285g) granulated sugar
- 3 large eggs
- 1 large egg yolk
- 1 tablespoon (15ml) pure vanilla extract
- ¾ cup (105g) all-purpose flour
- ¾ cup (84g) cocoa powder, sifted
- 1 teaspoon salt
- ¾ teaspoon baking powder
Instructions
- Preheat the oven to 350°F. Grease a 9×13-inch pan and line the bottom and sides with parchment paper. Allow the butter to soften for at least 20 minutes.
- Combine the softened butter with the brown and granulated sugar. Beat on medium speed until well combined, 2-3 minutes.
- Add the egg, egg yolk, and vanilla extract and continue beating until well incorporated.
- In a separate bowl, combine the flour, salt, and baking soda. Stir to combine and slowly add the dry ingredients into the dough, mixing on low speed until the dough starts to form. Before the dough thickens, add the chocolate chips. Beat until incorporated. Set aside.
- Chop the chocolate into smaller pieces and melt in a microwave-safe bowl for approximately 2 minutes at 50% power. Stir occasionally until completely melted and smooth. Set aside to cool.
- Melt the butter in a microwave-safe bowl and combine with the granulated sugar; beat together until well combined.
- Add the egg and egg yolk and beat for 60 seconds at a higher speed until the batter is fluffy.
- Add the vanilla extract and melted chocolate and beat until combined.
- Combine the dry ingredients in a separate bowl and stir to combine. Gradually add the dry ingredients to the batter and mix just until combined.
- Pour the brownie batter into the bottom of the pan. Take large pieces of the cookie dough, flatten them, and press them into the brownie batter. Continue layering the remaining cookie dough.
- Bake at 350°F for 35-40 minutes, covering with aluminum foil after 15-20 minutes to prevent too much browning. Test for doneness with a toothpick; the brownie should be a little fudgy but not wet.
Notes
- Ensure all ingredients are at room temperature for best results.
- Store any leftovers in an airtight container.
- For a nutty flavor, consider adding nuts to the brownie layer.
- Prep Time: 30 minutes
- Cook Time: 40 minutes
- Category: Dessert
- Method: Baking
- Cuisine: American
Nutrition
- Serving Size: 1 piece
- Calories: 280
- Sugar: 25g
- Sodium: 180mg
- Fat: 12g
- Saturated Fat: 7g
- Unsaturated Fat: 3g
- Trans Fat: 0g
- Carbohydrates: 40g
- Fiber: 2g
- Protein: 3g
- Cholesterol: 50mg