No-Bake Berry Icebox Cake

Introduction to No-Bake Berry Icebox Cake
Ah, summer! The season of carefree days and refreshing treats. If you’re like me, the heat brings a craving for something light and delicious. Enter the No-Bake Berry Icebox Cake! This delightful dessert layers creamy filling, sweet berries, and crunchy graham crackers into a symphony of flavors. It’s perfect for busy lives—no oven required! You can whip it up in no time, allowing you more moments to enjoy with family and friends. So, let’s bring some joy to your gatherings and indulge in a dessert that’s sure to impress everyone around the table.
Why You’ll Love This No-Bake Berry Icebox Cake
This No-Bake Berry Icebox Cake is a dream come true for busy moms and professionals like us. It’s unbelievably easy to make, taking just 30 minutes of your time, not counting the chill time. The best part? You get a refreshing burst of flavors without ever turning on the oven! With luscious layers of cream and bright berries, it’s a treat that feels indulgent yet stays light for summer fun.
Ingredients for No-Bake Berry Icebox Cake
Gathering the right ingredients is half the fun of cooking. For this No-Bake Berry Icebox Cake, you’ll need a mix of delicious components. Here’s what you’ll be using:
- Heavy Whipping Cream: This is the base for our dreamy whipped layer. Always start with chilled cream for the best results.
- Powdered Sugar: It sweetens the whipped cream, allowing that sweetness to shine without overwhelming the other flavors.
- Vanilla Extract: Adds a warm, aromatic note, balancing the creaminess with its fragrant essence.
- Cream Cheese: A key player, providing that rich and creamy texture that we all love in desserts.
- Vanilla Instant Pudding Mix: This brings an extra layer of richness and helps thicken our filling beautifully.
- Cold Milk: You’ll need this to bring everything together. Substituting with almond or oat milk could work if you prefer dairy alternatives.
- Graham Crackers: These act as the sturdy, sweet foundation for our layers, offering a delightful crunch.
- Fresh Strawberries: Sweet and vibrant, they add a burst of color and flavor. Feel free to mix in other berries if you like!
- Fresh Blueberries: Their juicy pop complements the strawberries perfectly, adding both sweetness and a beautiful hue.
- White Chocolate Chips: These are for drizzling on top, providing a touch of sweetness that ties everything together.
Not only do these ingredients create a visually stunning dessert, but they also create a medley of flavors and textures. If you’re interested in exact measurements, don’t worry—the detailed list is at the bottom of the article and available for printing!
How to Make No-Bake Berry Icebox Cake
Now that we have our ingredients ready, let’s dive into making this No-Bake Berry Icebox Cake! Follow these simple steps, and you’ll have a dessert that’s as impressive as it is delicious.
Step 1: Prepare the Whipped Cream
Start by beating the chilled heavy whipping cream in a large mixing bowl. You can use a hand mixer or a stand mixer—whichever suits you best. Add the powdered sugar and vanilla extract while beating. Keep mixing until you see stiff peaks form. This means the cream holds its shape beautifully! If it starts to look grainy, you’ve gone a bit too far, so pay close attention.
Step 2: Mix the Cream Cheese Filling
In another large bowl, beat the softened cream cheese until it’s smooth and creamy. Incorporate the vanilla pudding mix and pour in about half of the cold milk. Blend it well until the mixture is smooth. Gradually add the remaining milk while mixing. This step ensures that everything combines perfectly, creating a creamy and luscious filling.
Step 3: Build the First Layer
Now it’s time to layer! Start by spreading a thin layer of the creamy filling on the bottom of your 13 x 9-inch casserole dish. Just about half a cup should do—this helps stick the bottom layer of graham crackers in place. Next, take those graham crackers and arrange them on top. Feel free to break them as needed to cover the entire bottom.
Step 4: Add the Filling and Berries
Here comes the fun part! Gently spread one-third of that luscious filling over the crackers—aim for about 2.5 to 3 cups. Now, add a layer of fresh sliced strawberries, then scatter about a cup of blueberries into the gaps. Trust me, this colorful burst of berries will make your dessert pop!
Step 5: Final Layers and Decorating
Repeat the process: add another layer of graham crackers, followed by another third of the filling, then more strawberries and blueberries. Do this twice until you’ve used up all your ingredients. For the final touch, place one last layer of graham crackers on top, and spread the remaining filling over it. Now, take the strawberries that you sliced in half and whole blueberries to create a beautiful garnish. Finally, melt your white chocolate chips and drizzle them artfully over the top.
Step 6: Chill Before Serving
Here’s the secret to greatness: let the cake chill in the fridge for at least six hours, but overnight is even better! This soaking time allows all those layers to meld together, enhancing the flavor. Once chilled, slice it up, serve, and watch your loved ones savor every bite of your No-Bake Berry Icebox Cake!
Tips for Success
- Always use chilled heavy whipping cream for the fluffiest results.
- Soften cream cheese at room temperature for easier mixing.
- Layer the cake thoughtfully to avoid berries sinking to the bottom.
- Let the cake sit overnight for maximum flavor and creaminess.
- Experiment with different berries to customize it to your taste!
Equipment Needed
- Large Mixing Bowl: Use any sturdy bowl you have on hand.
- Hand Mixer or Stand Mixer: If you don’t have either, a whisk works too, but it’ll take longer.
- 13 x 9-inch Casserole Dish: A similar-sized baking dish can substitute.
- Measuring Cups and Spoons: Handy for accuracy.
- Spatula: Great for spreading and layering your filling evenly.
Variations of No-Bake Berry Icebox Cake
- Mixed Berry Delight: Combine strawberries, blueberries, raspberries, and blackberries for a vibrant mix of flavors.
- Chocolate Lovers: Substitute vanilla pudding with chocolate pudding and add crushed Oreos between the layers for a decadent twist.
- Peanut Butter Fan: Swirl in some creamy peanut butter into the filling for a nutty undertone that complements the berries.
- Dairy-Free Option: Use coconut cream and dairy-free cream cheese to make this cake suitable for a dairy-free diet.
- Low-Sugar Version: Replace powdered sugar with a sugar substitute to enjoy a guilt-free dessert without sacrificing taste.
Serving Suggestions for No-Bake Berry Icebox Cake
- Pair with a refreshing mint tea or lemonade for a perfect summer drink.
- Add a scoop of vanilla ice cream on the side for extra indulgence.
- Garnish with fresh mint leaves to brighten the presentation.
- For a festive touch, serve on a colorful platter with additional berries.
- Top slices with extra whipped cream for a creamy finish.
FAQs about No-Bake Berry Icebox Cake
Can I make No-Bake Berry Icebox Cake ahead of time?
Absolutely! In fact, making it a day in advance is recommended. Chilling overnight enhances the flavors and gives it the perfect texture.
What if I can’t find graham crackers?
No worries at all! You can substitute with crushed digestive biscuits or even shortbread cookies. Both will add a lovely flavor and crunch.
Can I use frozen berries instead of fresh?
Yes, you can! Just make sure to thaw and drain any excess liquid before layering them in the cake. Fresh is always nice, but frozen works too!
Is this No-Bake Berry Icebox Cake suitable for special diets?
You can definitely customize it! Use dairy-free cream cheese and coconut cream for a delightful dairy-free version, or replace sugar with a sugar substitute for a low-sugar option.
How long does the No-Bake Berry Icebox Cake last in the fridge?
It’ll stay fresh for about 3-4 days if covered properly in the refrigerator. It might not last that long—it’s that delicious!
Final Thoughts on No-Bake Berry Icebox Cake
Creating this No-Bake Berry Icebox Cake has been such a delightful journey! There’s something truly magical about layering that creamy filling and vibrant berries, knowing it will transform into a refreshing treat. With a preparation time of just thirty minutes, it easily fits into our busy schedules. Plus, the joy on my family’s faces as they savor each bite makes it all worthwhile. This cake isn’t just a dessert; it’s a way to bring loved ones together under the summer sun. I hope it becomes a cherished recipe in your home, just as it has in mine!
Print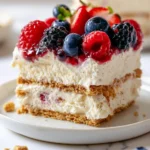
No-Bake Berry Icebox Cake: A Delicious Summer Treat!
- Total Time: 6 hours and 30 minutes (including chilling time)
- Yield: 12 servings 1x
- Diet: Vegetarian
Description
A refreshing and delicious no-bake dessert filled with layers of creamy filling, fresh berries, and graham crackers.
Ingredients
- 3 cups (720 ml) heavy whipping cream
- 1/3 cup (40 grams) powdered sugar
- 2 teaspoons vanilla extract
- 8 oz. (226 grams) cream cheese-softened
- 2 (3.4 oz.) boxes vanilla instant pudding mix
- 2 1/2 cups (600 ml) cold milk
- 14 oz. (400 grams) graham crackers
- 2 lb. (900 grams) fresh strawberries (1 lb. thinly sliced and 1 lb. sliced in half)
- about 3 cups (400 grams) fresh blueberries (depending on sizes)
- 1/4 cup white chocolate chips
Instructions
- Beat chilled heavy whipping cream, powdered sugar, and vanilla extract until stiff peaks form, then set aside.
- In a large mixing bowl, beat the cream cheese until smooth.
- Add vanilla instant pudding and about half of the milk, and continue mixing while slowly pouring in the remaining milk. Mix until fully combined.
- Add whipped cream and mix until smooth.
- Spread a thin layer of filling in the bottom of a 13 x 9-inch casserole dish (about 1/2 cup of filling, just to stick the bottom layer of graham crackers).
- Arrange a layer of crackers. Break them apart to fit as needed.
- Spread 1/3 of the filling (about 2.5-3 cups) over the crackers.
- Arrange sliced strawberries and scatter about 1 cup of blueberries in the gaps.
- Repeat the process: arrange single layers of crackers, spread 1/3 of the filling, cover with sliced strawberries, and whole blueberries.
- Arrange the final, third layer of graham crackers, and spread the remaining third of the filling.
- Decorate with strawberries sliced in half and whole blueberries.
- Melt white chocolate chips and drizzle over the top.
- Place in the fridge for at least 6 hours before serving, and preferably overnight for the best results.
- Store in the fridge for 3-4 days.
Notes
- For the best flavor, let the cake sit overnight before serving.
- Store leftovers covered in the refrigerator.
- Feel free to substitute other berries or add additional toppings as desired.
- Prep Time: 30 minutes
- Cook Time: 0 minutes
- Category: Dessert
- Method: No-Bake
- Cuisine: American
Nutrition
- Serving Size: 1 slice
- Calories: 380
- Sugar: 23g
- Sodium: 150mg
- Fat: 25g
- Saturated Fat: 15g
- Unsaturated Fat: 5g
- Trans Fat: 0g
- Carbohydrates: 36g
- Fiber: 2g
- Protein: 4g
- Cholesterol: 70mg