Old Fashioned Pan Fried Okra

Introduction to Old Fashioned Pan Fried Okra
Welcome to a delightful culinary adventure! If you’re seeking a way to infuse some Southern charm into your busy weeknight dinners, look no further than Old Fashioned Pan Fried Okra. This crispy delight is not just a side dish; it’s a warm hug from the South, perfect for impressing family and friends. I can’t count how many times this recipe has turned a rushed meal into a comforting gathering. With minimal prep and just a handful of ingredients, it’s a quick solution for a hectic day that’ll leave everyone asking for seconds!
Why You’ll Love This Old Fashioned Pan Fried Okra
This Old Fashioned Pan Fried Okra is a simple yet flavorful addition to your dinner table. It’s incredibly easy to whip up, taking only about 30 minutes from start to finish. The crispy coating gives every bite a satisfying crunch. Plus, this dish can delight even the pickiest eaters, making it a perfect option for families. Who doesn’t love a dish that combines speed, ease, and taste seamlessly?
Ingredients for Old Fashioned Pan Fried Okra
Let’s gather everything we need for this delicious dish. Here’s a rundown of the ingredients that will create tasty Old Fashioned Pan Fried Okra.
- Fresh Okra: The star of the show, okra adds a unique flavor and vibrant green color.
- All Purpose Flour: This is the foundation of our crispy coating, giving it that satisfying crunch.
- Cornmeal: Adds a lovely texture and enhances the overall flavor profile.
- Salt: Just a touch adds to the flavor, but feel free to sprinkle more on top after frying!
- Black Pepper: A dash brings a hint of warmth and balances the flavors beautifully.
- Garlic Powder: This ingredient infuses a savory richness, elevating the dish to another level.
- Large Egg: Acts as a binder, helping the coating stick to the okra slices.
- Milk: Adds moisture and creaminess to the egg mixture, ensuring even coverage.
- Vegetable Oil: Essential for frying! Choose your oil wisely—canola or peanut oil work great.
Keep in mind that precise measurements for these ingredients are at the bottom of the article, available for easy printing!
How to Make Old Fashioned Pan Fried Okra
Now, let’s dive into the magic of preparing this crispy delight! Follow these simple steps, and I promise you’ll have perfectly fried okra in no time. Trust me, it’s a joyful process!
Preparing the Okra
Start by washing your fresh okra under cool water. Removing any dirt is essential. Once clean, trim the ends to get rid of the tough tips. Then, slice each okra piece into ½-inch rounds. Don’t worry if some of the slices get a little uneven; that just adds character!
Mixing the Coatings
In a resealable bag, combine all-purpose flour, cornmeal, salt, black pepper, and garlic powder. Giving it a hearty shake mixes everything evenly. Set it aside; this will be your flavor-packed coating. In a medium bowl, whisk together the egg and milk until smooth. This mixture will help the flour stick to the okra like a warm hug!
Frying the Okra
Time to get frying! Heat your vegetable oil in a skillet over medium-high heat. You want it to reach a sizzling 350°F for the perfect fry. While the oil heats, take a handful of your okra slices and dip them into the egg mixture, ensuring each piece is well-coated. Then, toss them into the flour mixture, shaking the bag to coat evenly. This is where the fun happens!
Once the oil is hot, carefully drop the first batch of coated okra into the skillet. Be cautious, as it’ll sizzle! Move the okra around with a spatula, ensuring they don’t stick together. Fry for about 3-4 minutes until they turn a rich golden brown. Repeat this process with the remaining okra slices, always checking the oil temperature.
Draining and Serving
Once the okra is done, use a slotted spoon to remove them from the oil. Place them on a sheet pan lined with paper towels to drain off any excess oil. Sprinkle a little extra salt on top while they’re still hot for an added burst of flavor. Serve your Old Fashioned Pan Fried Okra warm and watch it disappear fast!
Tips for Success
- For the crispiest texture, make sure oil is fully heated before adding okra.
- Fry in small batches to avoid overcrowding, allowing even cooking.
- Let the coated okra rest for a few minutes before frying for better adhesion.
- Experiment with spices like paprika or cayenne for extra kick.
- Keep fried okra warm in a low oven until ready to serve.
Equipment Needed
- Skillet: A cast-iron or non-stick skillet works best.
- Frying Thermometer: Ensures you hit that perfect frying temperature.
- Slotted Spoon: Ideal for lifting out fried okra without a mess.
- Mixing Bowls: Use any medium bowl for the egg mixture and for batter.
- Resealable Bag: Perfect for mixing the coating without the mess.
Variations of Old Fashioned Pan Fried Okra
- Spicy Kick: Add cayenne pepper or chili powder to the flour mixture for a fiery twist.
- Herb Infusion: Mix dried herbs like oregano or thyme into the coating for a fragrant touch.
- Gluten-Free: Replace all-purpose flour with a gluten-free blend for a similar crunch.
- Cheesy Delight: Sprinkle grated Parmesan cheese into the flour mixture for a savory depth.
- Baking Option: For a healthier take, coat and bake the okra at 400°F for a lighter version, tossing them halfway through.
Serving Suggestions for Old Fashioned Pan Fried Okra
- Pair it with: Southern classics like fried chicken or catfish for a hearty meal.
- Style your plate: Use a colorful platter to showcase the golden okra.
- Drink Suggestion: Sweet tea or lemonade complements this dish perfectly.
- Top it off: Serve with a side of remoulade or ranch dressing for dipping.
FAQs about Old Fashioned Pan Fried Okra
As a passionate home cook, I love sharing delicious recipes, and Old Fashioned Pan Fried Okra is no exception. Here are some frequently asked questions that might help you on your culinary journey.
Can I use frozen okra for this recipe?
While fresh okra yields the best results, you can use frozen okra. Just ensure it’s fully thawed and drained to avoid excess moisture, which can affect the crispiness.
How do I store leftovers of Old Fashioned Pan Fried Okra?
If you have any leftovers, place them in an airtight container. They’ll last about two days in the fridge, although they may lose some crunch.
What should I serve with Old Fashioned Pan Fried Okra?
This dish pairs wonderfully with grilled meats, cornbread, or a fresh salad. Try adding a zesty sauce for dipping, and watch it disappear!
Can I make this dish in advance?
Old Fashioned Pan Fried Okra is best enjoyed fresh. However, you can prepare the coating and slice the okra ahead of time, making dinner even quicker.
Can I adjust the spiciness of the okra?
Absolutely! Feel free to add your favorite spices to the coating mixture. A dash of cayenne or smoked paprika can bring up the flavor and heat to your liking!
Final Thoughts
Old Fashioned Pan Fried Okra is more than just a recipe; it’s an experience that brings comfort and joy to every meal. The delightful crunch and savory flavor transport me back to family gatherings filled with laughter and good food. I love how easily this dish can elevate a simple dinner into a cherished moment. Whether served alongside a hearty main course or just as a snack, it’s a crowd-pleaser that everyone can enjoy. I hope this recipe becomes a staple in your home, just as it has in mine—creating delicious memories with every crispy bite!
Print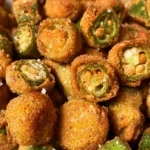
Old Fashioned Pan Fried Okra
- Total Time: 30 minutes
- Yield: 4 servings 1x
- Diet: Vegetarian
Description
A delicious recipe for Old Fashioned Pan Fried Okra that delivers a crispy texture and great flavor.
Ingredients
- 24 Ounces Fresh Okra
- 1 Cup All Purpose Flour
- ¼ Cup Cornmeal
- ½ teaspoon Salt + more for sprinkling after
- ¼ teaspoon Black Pepper
- ½ teaspoon Garlic Powder
- 1 Each Large Egg
- ¼ Cup Milk
- 2 Cups Vegetable Oil for frying
Instructions
- Add the cooking oil to your skillet and heat over medium high heat, until 350°F.
- While the oil is heating, prepare the okra for cooking. Cut the tips off the ends then slice into ½” slices.
- Add the flour, cornmeal, salt, pepper and garlic powder to a resealable bag and shake well. Set aside.
- To a medium sized mixing bowl, add the egg and milk and beat until well mixed.
- Add a batch of the sliced okra to the egg mixture first and move about using your hand to make sure all the slices are coated and wet.
- Add this batch to the flour mixture and shake well to coat evenly.
- Check that the oil is definitely at 350°F using a frying thermometer. Drop this first batch of okra into the hot oil, carefully.
- Move around with a frying spatula to make sure they don’t stick and to turn over. Cook for about 3-4 minutes, until golden brown.
- Remove from the grease to a sheet pan lined with paper towel and sprinkle a little extra salt.
- Repeat with another batch of the okra, until all is cooked.
Notes
- For best results, ensure the oil is at the correct temperature before frying.
- Leftover okra can be stored in an airtight container for up to 2 days.
- Experiment with different seasonings in the flour mixture for a unique flavor.
- Prep Time: 15 minutes
- Cook Time: 15 minutes
- Category: Side Dish
- Method: Frying
- Cuisine: Southern
Nutrition
- Serving Size: 1/4 of the recipe
- Calories: 245
- Sugar: 1g
- Sodium: 150mg
- Fat: 15g
- Saturated Fat: 1.5g
- Unsaturated Fat: 13.5g
- Trans Fat: 0g
- Carbohydrates: 26g
- Fiber: 3g
- Protein: 4g
- Cholesterol: 40mg