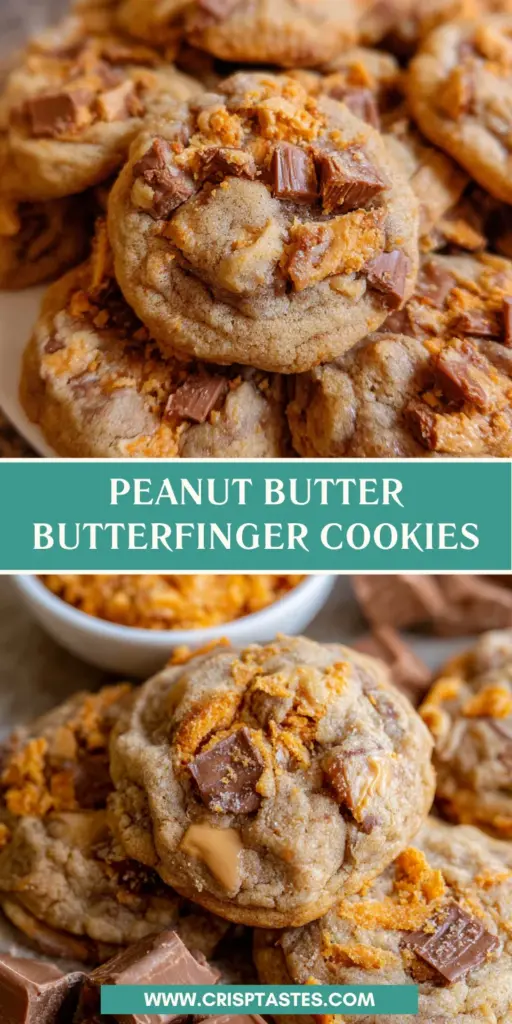
Peanut Butter Butterfinger Cookies

Introduction to Peanut Butter Butterfinger Cookies
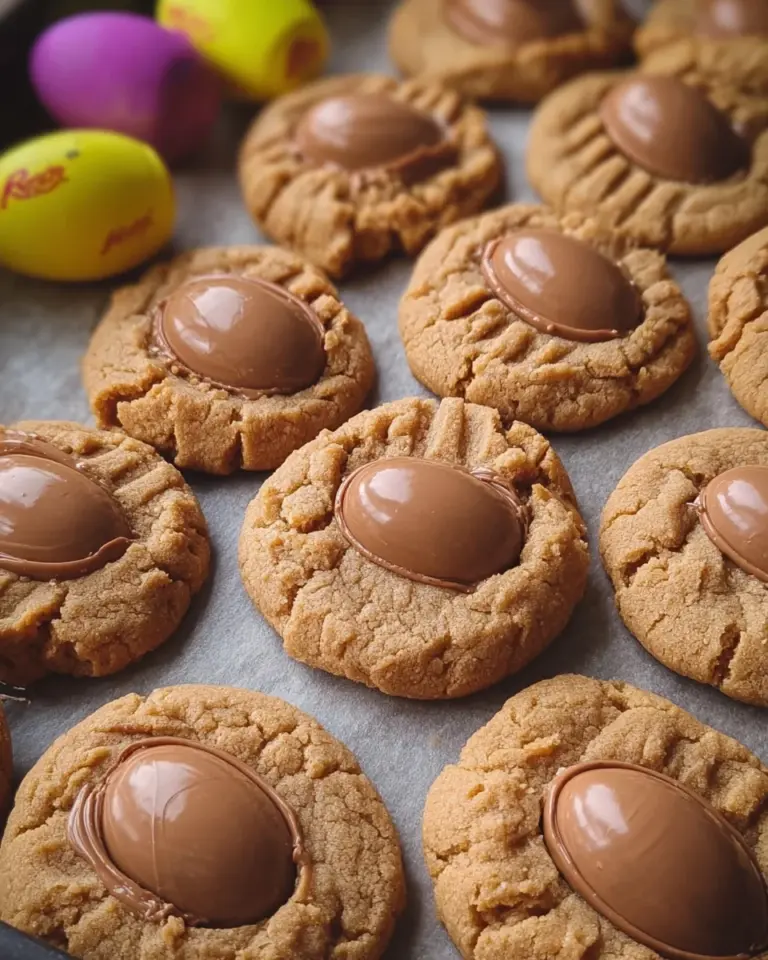
Hello, fellow cookie lovers! If you’re a busy mom or juggling work and family, you’ll understand the need for quick and satisfying treats. That’s where my Peanut Butter Butterfinger Cookies come in! These delightful cookies blend creamy peanut butter with crunchy Butterfinger pieces, creating a sweet indulgence that’s hard to resist. Perfect for an impromptu gathering or a cozy night in, they offer that sweet escape we all crave. Trust me—baking these cookies not only fills your home with warmth, but also pleases everyone at the table. Let’s dive into this delicious adventure together!
Why You’ll Love This Peanut Butter Butterfinger Cookies
These Peanut Butter Butterfinger Cookies are a game-changer. First, they’re incredibly easy to whip up, so even on a hectic day, you can enjoy fresh-baked goodness. Second, the combination of peanut butter and Butterfinger pieces delivers an explosion of flavor that will leave your family begging for more. Plus, their chewy texture makes every bite a delightful experience. Seriously, these cookies are sure to brighten anyone’s day!
Ingredients for Peanut Butter Butterfinger Cookies
Gathering the right ingredients is the first step to cookie bliss! Here’s what you’ll need for these Peanut Butter Butterfinger Cookies:
- Butter: Softened butter creates that rich, creamy texture we all love in cookies. I recommend using real butter for the best flavor.
- Granulated Sugar: This adds sweetness and helps in achieving the perfect cookie structure, making every bite a delight.
- Brown Sugar: Packed brown sugar infuses moisture and a hint of caramel flavor, enhancing the overall sweetness.
- Peanut Butter: Use creamy peanut butter (like Jif!) for maximum flavor; it’s essential for that perfect nutty taste!
- Egg: A large egg binds the ingredients and adds richness, ensuring your cookies are tender and chewy.
- Vanilla Extract: Pure vanilla extract elevates the flavor profile, bringing a warm essence to the mix.
- All-Purpose Flour: The backbone of the cookies, flour gives them structure. Spoon and level for the right measurement!
- Baking Soda: This leavening agent helps the cookies rise a bit, making them soft and chewy.
- Baking Powder: Works alongside baking soda for added lift, contributing to that tender crumb.
- Kosher Salt: A pinch of salt balances the sweetness and enhances all flavors.
- Butterfinger Candy Bars: Chopped Butterfinger pieces are the star of the show! Their crunchy texture and sweet caramel flavor add a delightful surprise.
You’ll find exact quantities towards the end of the article for your convenience. Happy baking!
How to Make Peanut Butter Butterfinger Cookies
Welcome to the heart of the cookie-making adventure! Here, I’ll walk you through each step needed to create your own Peanut Butter Butterfinger Cookies. Just follow along, and soon you’ll have cookie perfection in your hands!
Step 1: Creaming the Butter
First things first, let’s cream that butter! I like to start with room temperature butter for smooth mixing. Using a large bowl or stand mixer, beat the softened butter until it’s light and fluffy. This step is crucial; it incorporates air into the dough, which helps create that dreamy texture we all crave in cookies. Keep it going for about 2 minutes, and you’ll see the color brighten. Trust me, this will make your cookies irresistibly soft!
Step 2: Mixing the Sugars
Now it’s time to mix in the sugars. Add the granulated sugar and packed brown sugar to the creamed butter. Beat them together for another couple of minutes until the mixture is fluffy and well combined. This step isn’t just about sweetness; the sugars also play a role in the cookie structure. Thoroughly combining them ensures a wonderful balance, making your cookies soft on the inside with a slight crisp on the edges. The best of both worlds!
Step 3: Incorporating Peanut Butter
Next up is the star of the show—peanut butter! Scoop in that creamy goodness and mix it until well combined. Peanut butter is not just for flavor; it gives the cookies their signature chewy texture. Gotta love that nutty richness! It complements the sweetness of the sugars beautifully, adding depth to each bite. I always use Jif, as its consistency works like a charm for baking.
Step 4: Adding Wet Ingredients
Time to add some wetness! Crack in the large egg and pour in the vanilla extract. Beat these wet ingredients into your peanut butter mixture until everything is well blended. This extra richness from the egg enhances the overall flavor and texture. The vanilla adds a warm essence to the cookies, making the aroma waft through your home, welcoming family members to the kitchen. It’s pure joy in a bowl!
Step 5: Combining Dry Ingredients
In a separate bowl, whisk together the all-purpose flour, baking soda, baking powder, and kosher salt. This step helps to evenly distribute the leavening agents throughout the flour. Carefully fold those dry ingredients into the wet mixture, being careful not to overmix. You just want everything to come together; a few flour streaks are perfectly fine! Overmixing can lead to tough cookies, and we definitely don’t want that.
Step 6: Folding in Butterfinger
Now comes the fun part—adding the Butterfinger! Gently fold in the chopped candy pieces until they’re just incorporated into the dough. I find that using a spatula works wonders here, as it allows for a gentle touch. This step preserves the cookies’ beautiful texture and keeps those crunchy bits intact. You want every bite to be bursting with that sweet, crunchy surprise!
Step 7: Chilling the Dough
Chilling the dough is a crucial, but often overlooked, step! It may seem like an extra wait, but trust me, it helps the cookies hold their shape while baking. Cover the bowl with plastic wrap and chill the dough for at least 15 minutes, but up to an hour is even better. If you’re preparing ahead, you can even chill it for 24 hours! This little pause allows flavors to meld and creates an even more enjoyable cookie.
Step 8: Baking the Cookies
Once your dough is chilled, preheat the oven to 350°F and prepare your baking sheets with parchment paper. Shape the cookie dough into 2-inch balls and space them on the sheets. I usually leave a couple of inches in between them to allow for spreading. Bake for about 10 minutes until the edges are set, but the center still looks slightly soft. The cookies will continue baking on the pan after you remove them, so don’t worry about that shiny appearance. So much goodness awaits!
Tips for Success
- Always use room temperature butter for easy creaming.
- For a richer flavor, stick with creamy peanut butter, preferably Jif.
- Chill the dough! It helps maintain cookie shape and enhances flavor.
- Don’t overmix—gently fold in dry ingredients and Butterfinger bits.
- Let cookies cool completely for the best texture and taste.
Equipment Needed
- Mixing Bowl: A large bowl is essential; a stand mixer works wonders too!
- Measuring Cups: For precise ingredient measurements; use liquid and dry measuring cups.
- Spatula: Handy for folding in butterfingers and scraping the bowl clean.
- Baking Sheets: Parchment-lined baking sheets ensure easy cookie removal.
- Cooling Rack: Ideal for cooling cookies evenly; a plate works fine too!
Variations for Peanut Butter Butterfinger Cookies
- Dark Chocolate Drizzle: Melt dark chocolate and drizzle over cooled cookies for an elegant touch.
- Nut Substitutions: Swap peanut butter for almond butter or cashew butter for a unique nutty flavor.
- Gluten-Free Option: Use a good quality gluten-free flour blend to make these cookies gluten-free.
- Mix in Different Candies: Try adding chopped Snickers or Reese’s for a new twist on flavor.
- Additions of Oats: Stir in rolled oats for added texture and a bit of heartiness.
- Spice it Up: A sprinkle of cinnamon or nutmeg can add a warm, cozy flavor boost.
Serving Suggestions
- Serve warm cookies with a glass of cold milk for a classic pairing.
- Present cookies on a colorful platter for a festive touch at gatherings.
- Pair with a scoop of vanilla ice cream for an indulgent dessert treat.
- For coffee lovers, enjoy with a cup of strong brew for a delightful afternoon snack.
FAQs about Peanut Butter Butterfinger Cookies
Can I use natural peanut butter for this recipe?
I recommend sticking with creamy peanut butter like Jif. Natural peanut butter can alter the texture and result in drier cookies.
Can I make these cookies ahead of time?
Absolutely! You can chill the dough for up to 24 hours or freeze it for up to 3 months. Just bake them straight from the freezer when you’re ready!
What should I do if my cookies spread too much?
Make sure your dough is properly chilled before baking. Also, avoid overmixing the dough, as it can lead to excess spreading during baking.
How do I store leftover cookies?
Store your Peanut Butter Butterfinger Cookies in a tightly sealed container at room temperature for up to 3 days. They’ll stay delicious and chewy!
Can I use other candy bars instead of Butterfinger?
Definitely! Feel free to experiment with chopped Snickers, Reese’s, or even M&Ms for a fun twist on flavor and texture.
Final Thoughts
Making Peanut Butter Butterfinger Cookies is truly a joyful experience. There’s something magical about the aroma of freshly baked cookies wafting through your home. The combination of creamy peanut butter and crunchy Butterfinger brings a delightful twist that keeps everyone smiling around the table. These cookies are more than just treats; they create memories, spark laughter, and bring loved ones together. Whether you’re indulging after a long day or celebrating a special occasion, they’re bound to impress. So, gather your ingredients and let the baking begin! Happiness in every bite awaits you!
Print
Peanut Butter Butterfinger Cookies
- Total Time: 30 minutes
- Yield: 25 cookies 1x
- Diet: Vegetarian
Description
Delicious cookies made with peanut butter and chopped Butterfinger candy bars, perfect for any sweet tooth.
Ingredients
- 3/4 cup butter, softened (1 and 1/2 sticks)
- 1/2 cup granulated sugar
- 1/2 cup brown sugar, packed
- 1 cup peanut butter, don’t use natural pb
- 1 large egg
- 1 and 1/2 teaspoons vanilla
- 1 and 1/2 cups all-purpose flour, spooned and leveled
- 1/2 teaspoon baking soda
- 1/2 teaspoon baking powder
- 1/4 teaspoon kosher salt
- 16 ounces Butterfinger, chopped
Instructions
- In a large bowl or stand mixer, beat the softened butter until smooth and creamy.
- Add granulated sugar and packed brown sugar; beat for about 2 minutes until fluffy.
- Add peanut butter, mixing until combined.
- Add egg and vanilla, beating until combined.
- Add flour, baking soda, baking powder, and kosher salt; stir the dry ingredients slightly before mixing into the dough.
- Turn the mixer on to combine the dry ingredients into the dough, being careful not to overmix.
- Fold in the chopped Butterfinger until just incorporated.
- Cover the bowl and chill the dough for 15 minutes to an hour (up to 24 hours).
- Preheat oven to 350°F. Line baking sheets with parchment paper.
- Shape the dough into 2-inch balls and place them on the baking sheet.
- Bake for about 10 minutes until the edges are set but the center is not shiny.
- Let cookies set on the pan for at least 5 minutes before transferring to a cooling rack.
Notes
- Using Jif peanut butter is preferred.
- Cookies taste better once they’ve cooled to room temperature.
- Store leftovers in a tightly sealed container for up to 3 days.
- Dough can be frozen for up to 3 months, bake straight from frozen.
- Baked cookies can also be frozen for up to 4 weeks.
- Prep Time: 20 minutes
- Cook Time: 10 minutes
- Category: Dessert
- Method: Baking
- Cuisine: American
Nutrition
- Serving Size: 1 cookie
- Calories: 150
- Sugar: 10g
- Sodium: 150mg
- Fat: 7g
- Saturated Fat: 3g
- Unsaturated Fat: 4g
- Trans Fat: 0g
- Carbohydrates: 19g
- Fiber: 1g
- Protein: 3g
- Cholesterol: 15mg