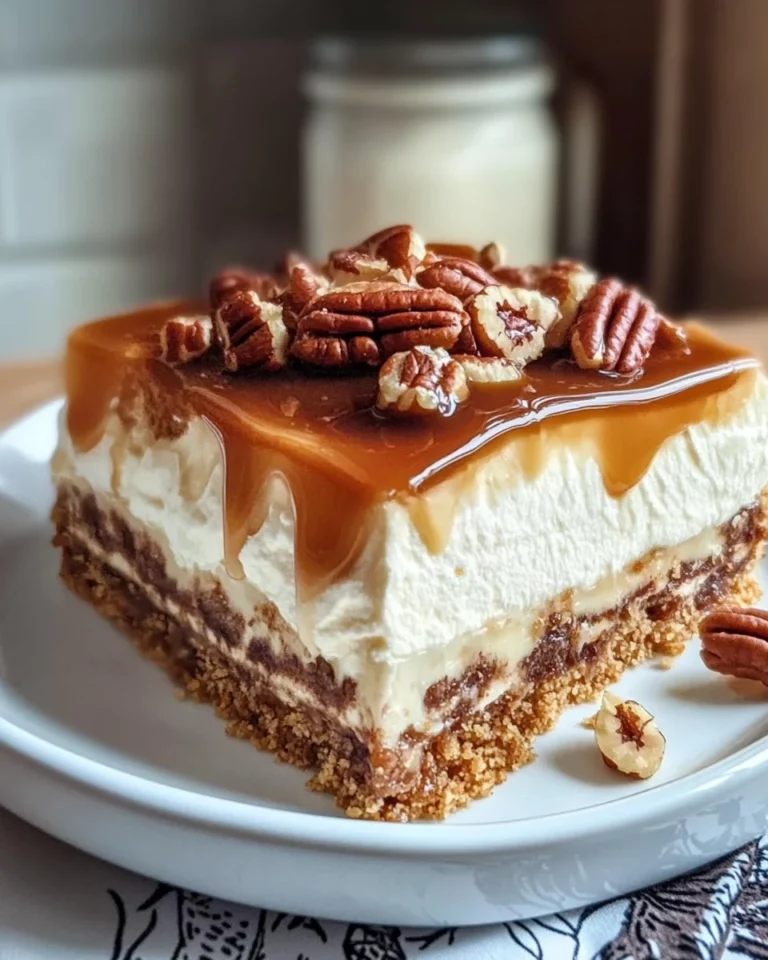
Red, white, and blue poke cake is a festive must-try!

Introduction to Red, White, and Blue Poke Cake
Hey there, fellow home cooks! If you’re in search of a festive treat that captivates both the eyes and taste buds, look no further than this delightful red, white, and blue poke cake. Perfect for celebrating everything from Independence Day barbecues to summer birthday parties, this cake is my go-to when I need to impress without spending all day in the kitchen. It’s a quick and fun recipe, making it ideal for busy moms like us. Plus, who can resist the colorful layers? Let’s dive into this culinary adventure together!
Why You’ll Love This Red, White, and Blue Poke Cake
This red, white, and blue poke cake is the superhero of desserts, swooping in to save the day with its ease and speed. In just a few simple steps, you’ll create a stunning dessert that tastes as good as it looks. The burst of flavors combined with that festive appearance makes it perfect for any gathering. Plus, it’s a fantastic way to get your family involved in the kitchen!
Ingredients for Red, White, and Blue Poke Cake
Gathering the ingredients for your red, white, and blue poke cake is the first step on this delightful journey. Here’s a quick rundown of what you’ll need:
- White cake mix: This is the base of our cake. Feel free to use a store-bought mix for convenience, or whip up a homemade version for extra love.
- Red and blue jello: These vibrant flavors bring life to our cake. They create that signature poke cake look, and you can experiment with different flavors if you prefer.
- Boiling water: Essential for dissolving the jello. The steam from the boiling water activates the flavors, making the jello super yummy.
- Cold water: This helps to cool down the jello mix. Be sure to follow the directions closely to achieve the perfect jiggly texture.
- Whipped topping: Adding a fluffy layer on top makes the cake feel like a party on your plate! You can use store-bought or whip your own for a fresher taste.
- Powdered sugar: A little sweetness for the whipped topping. This helps create a delicious balance to the cake’s flavors.
- Sprinkles: They add a fun, festive touch to your cake, making it irresistible for kids and adults alike!
For exact measurements and all the details you need, be sure to check out the end of the article, where I’ve made it easy for you to print the recipe.
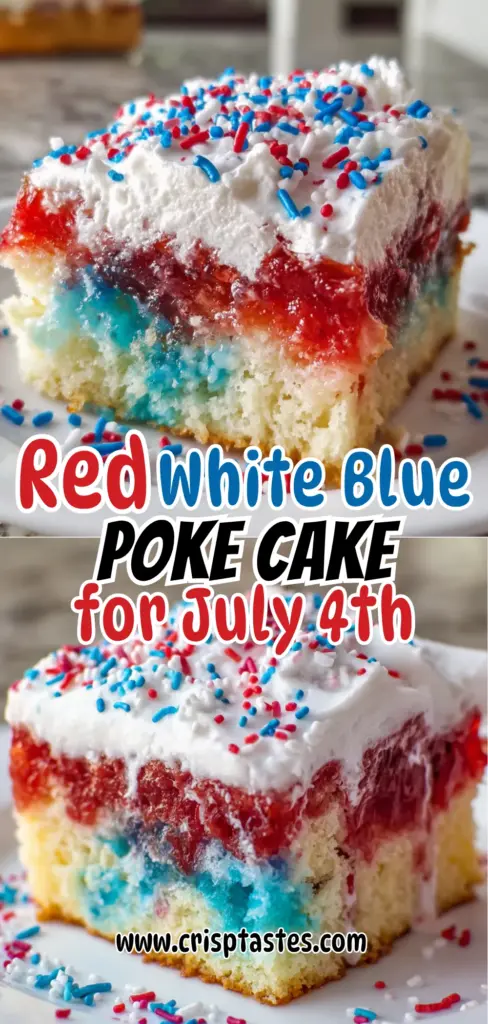
How to Make Red, White, and Blue Poke Cake
Step 1: Bake the Cake
Start your journey by preparing the white cake mix according to the package instructions. Usually, you’ll need to combine the mix with water, oil, and eggs. Beat it all together until smooth, then pour the batter into a greased baking pan. Bake it in a preheated oven for the time specified on the box. Once it’s golden brown, take it out and let it cool for at least 30 minutes. This cooling period is crucial, as it prepares the cake for all those delightful jello flavors.
Step 2: Poke Holes in the Cake
Once the cake has cooled, use the end of a wooden spoon to poke holes all over the surface. Aim for holes that go about ½ to ¾ of the way into the cake, but don’t poke all the way through the bottom. These holes will allow the colorful jello to seep in beautifully, creating the signature look of our red, white, and blue poke cake.
Step 3: Prepare the Jello
Next, it’s time to get that jello ready! Start with the red jello. In a bowl or large measuring cup, dissolve the red jello powder in 1 cup of boiling water. Stir it well until it’s fully dissolved, then mix in ½ cup of cold water. Repeat this process with the blue jello, using separate containers. Just make sure each jello is perfectly dissolved before moving on or the flavors won’t shine through.
Step 4: Pour in the Jello
Now for the fun part! Carefully pour the red jello into every other hole of the cake first. After that, do the same with the blue jello in the remaining holes. Be gentle to avoid mixing the two colors, as we want to keep those vibrant layers distinct. This step is key to achieving that colorful poke cake we all love!
Step 5: Chill the Cake
Cover the cake with plastic wrap and place it in the fridge. Chill it for at least 2 hours, allowing the jello to set perfectly. This helps the jello meld with the cake, ensuring each bite is bursting with flavor. Trust me, this is an essential step!
Step 6: Whip the Topping
While the cake chills, let’s prepare the whipped topping! In a medium bowl, whisk together the thawed whipped topping and powdered sugar until it’s fluffy and well blended. The powdered sugar adds just the right touch of sweetness without overpowering the jello flavor. This fluffy layer will bring everything together beautifully!
Step 7: Decorate and Serve
Finally, it’s time to add the finishing touches! Spread the whipped topping evenly over the cooled cake, creating a smooth, decadent layer. To make it even more festive, sprinkle your favorite toppings on top. A burst of colorful sprinkles will bring it all together, making your red, white, and blue poke cake a true showstopper!
Tips for Success
- Always use room temperature ingredients for the best texture and flavor in your cake.
- Ensure the jello is fully dissolved before adding cold water; this makes all the difference!
- Don’t rush the chilling time; allowing at least 2 hours for setting is crucial.
- Consider using a piping bag for the whipped topping for an elegant look.
- Get creative with sprinkles; different shapes can add a personal touch!
Equipment Needed
- Baking pan: A 9×13 inch pan works perfectly. If you don’t have one, a similar-sized dish will do.
- Mixing bowls: Use any medium-size bowl for mixing cake batter and jello.
- Whisk or electric mixer: A whisk works well for small batches, while an electric mixer saves time.
- Wooden spoon: Essential for poking holes in the cake; you can also use a skewer or fork.
- Measuring cups: Accurate measurements are key, so grab your trusty measuring cups!
Variations
- Fruit add-ins: Consider adding fresh berries like strawberries or blueberries on top of the whipped topping for a tasty twist!
- Different flavors: Switch up the jello flavors! Try lemon or lime for a zesty refresh or use watermelon and blueberry for a fun summer vibe.
- Gluten-free option: Use a gluten-free cake mix to make this a gluten-free dessert that everyone can enjoy.
- Healthier topping: For a lighter twist, substitute whipped topping with Greek yogurt mixed with a bit of honey for natural sweetness.
- Dairy-free version: Use a dairy-free cake mix and coconut cream instead of whipped topping for a delicious alternative.
Serving Suggestions
- Fresh fruit: Pair your red, white, and blue poke cake with a side of fresh strawberries, blueberries, and whipped cream for a deliciously sweet contrast.
- Refreshing drinks: Serve it alongside lemonade or iced tea to keep things cool and refreshing.
- Presentation: Use colorful dessert plates to enhance the festive look, making each slice pop with charm.
FAQs about Red, White, and Blue Poke Cake
Can I make this red, white, and blue poke cake ahead of time?
Absolutely! This cake can be made a day in advance. Just be sure to cover it well to keep it moist. Bring it out of the fridge about 15 minutes before serving to take the chill off.
What if I can’t find red and blue jello?
No worries! You can use any flavors of jello that you like and even different colors. Just aim for bright, festive colors to keep that celebratory vibe. Think orange and yellow for a sunshine-themed dessert!
How long does this poke cake last in the fridge?
Keep your red, white, and blue poke cake covered in the fridge for up to five days. Just be prepared: the longer it sits, the more the jello will set into the cake!
Can I use a different type of cake mix?
Certainly! While a white cake mix creates a classic base, any flavor you love can work. Chocolate or vanilla cake mix could give you a fun twist—and they taste amazing with the jello!
Is the recipe easily adaptable for dietary restrictions?
Definitely! You can use a gluten-free cake mix and substitute the whipped topping with a dairy-free option like coconut cream. This way, everyone can enjoy your festive dessert!
Final Thoughts
This red, white, and blue poke cake is more than just a dessert; it’s a celebration of flavors and memories. I love how it brings family and friends together, creating joyful moments around the table. Whether you’re whipping it up for a holiday gathering or just because you want to brighten your day, this cake is bound to make a splash. The vibrant colors and delightful taste are sure to put smiles on everyone’s faces. So, gather your ingredients and dive into this sweet adventure—your taste buds will thank you!
Print
Red, white, and blue poke cake
- Total Time: 2 hours 45 minutes
- Yield: 12 servings 1x
- Diet: Vegetarian
Description
Red, white, and blue poke cake is a festive must-try for any celebration.
Ingredients
- 1 white cake mix plus ingredients listed on the box (mine was 1 cup water, ½ cup oil, 3 eggs)
- 1 3 oz package red jello
- 1 3 oz package blue jello
- 2 cups boiling water divided
- 1 cup cold water divided
- 1 8 oz tub whipped topping thawed
- ¼ cup powdered sugar
- Sprinkles
Instructions
- Bake your cake according to the package directions and let it cool for at least 30 minutes.
- Using the end of a wooden spoon poke holes over the entire cake. They should be about ½ – ¾ the depth of the cake, just don’t poke all the way through.
- In a small bowl or large measuring cup dissolve red jello in 1 cup of boiling water. When jello powder is dissolved stir in ½ cup cold water.
- In a separate small bowl or large measuring cup dissolve the blue jello in 1 cup of boiling water. When the jello powder is dissolved stir in ½ cup cold water.
- Carefully pour the red and blue jello into alternating holes in the cake. Be careful not to mix them or you will end up with a purple cake.
- Cover and refrigerate for at least 2 hours.
- In a medium bowl whisk together whipped topping and powdered sugar.
- Spread whipped topping over the cake and top with sprinkles.
Notes
- For best results, use room temperature ingredients when making the cake.
- Ensure jello is fully dissolved before adding cold water.
- Let the cake chill long enough to set the jello properly.
- Prep Time: 15 minutes
- Cook Time: 30 minutes
- Category: Dessert
- Method: Baking
- Cuisine: American
Nutrition
- Serving Size: 1 slice
- Calories: 276
- Sugar: 24g
- Sodium: 220mg
- Fat: 12g
- Saturated Fat: 4g
- Unsaturated Fat: 8g
- Trans Fat: 0g
- Carbohydrates: 37g
- Fiber: 0g
- Protein: 2g
- Cholesterol: 32mg