Santa’s Trash Cookie Bars

Why These Cookie Bars Are a Holiday Favorite
There are holiday desserts that look elegant and polished… and then there are desserts like Santa’s Trash Cookie Bars—messy in the best possible way, overloaded with sweet and salty mix-ins, and almost impossible to stop eating once you start. These bars are fun, festive, colorful, and packed with enough texture and flavor to make every bite feel different.
The name “trash cookie bars” might sound odd at first, but longtime holiday bakers know exactly what it means: take all the best snack and candy ingredients you have around during the holidays and throw them together into one ridiculously delicious dessert. Chocolate chips, pretzels, candy-coated chocolates, toffee bits, peppermint, frosting—it’s chaos, but somehow it works perfectly.
What makes these bars especially popular during Christmas is how customizable they are. They’re great for using leftover candy, they feed a crowd easily, and they instantly look festive thanks to all the colorful toppings. Plus, unlike cutout cookies or decorated cakes, they don’t require precision or perfection. In fact, the more loaded and over-the-top they look, the better.
Sweet, Salty, Crunchy, and Completely Irresistible
The combination of textures is what makes these bars so addictive. You get chewy cookie dough, melty chocolate, crunchy pretzels, creamy frosting, and bits of peppermint all in one bite.
That balance between sweet and salty keeps the bars from feeling overly sugary.
The Fun Story Behind “Trash” Desserts
“Trash” desserts became popular because they embrace the idea of mixing together leftover snacks, candies, and baking ingredients instead of letting them go to waste.
The result is usually playful, colorful, and unexpectedly delicious.
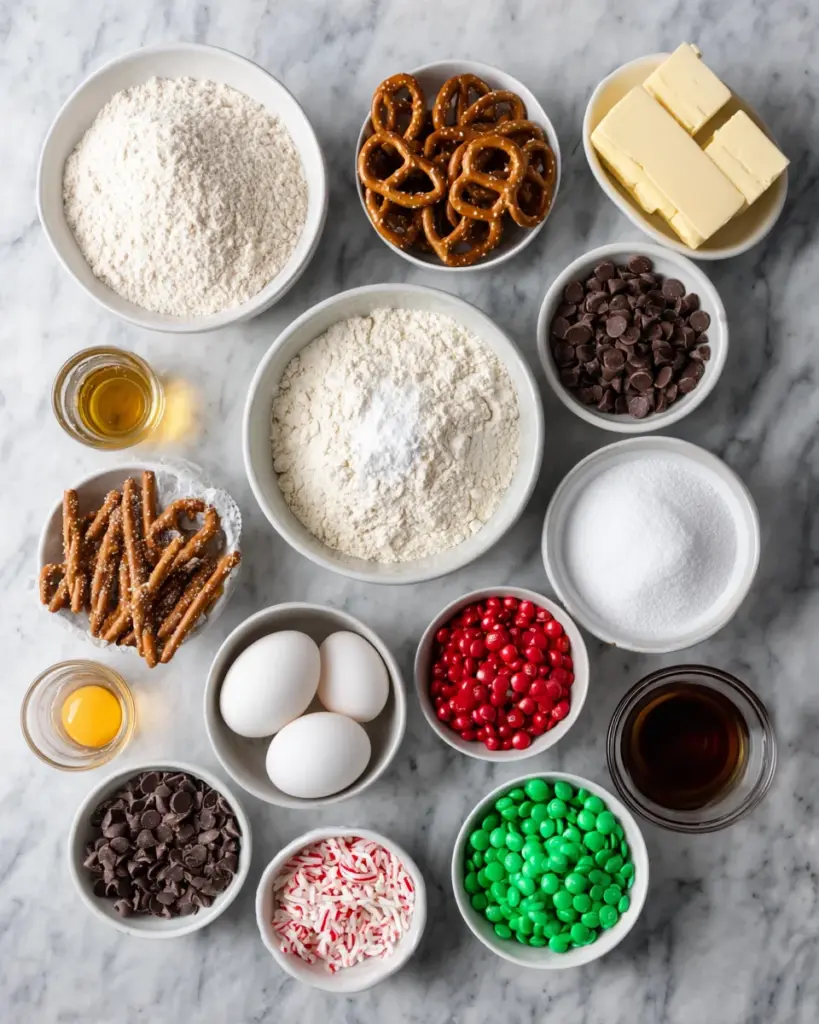
Ingredients Breakdown and Flavor Profile
Every ingredient adds something important to the final texture and flavor.
The Soft and Chewy Cookie Base
The cookie dough base combines butter, brown sugar, eggs, and vanilla to create bars that are soft, chewy, and rich.
Brown sugar adds moisture and a slight caramel flavor that works beautifully with the salty pretzels and chocolate.
Chocolate, Candy, Pretzels, and Toffee Mix-Ins
This is where the magic happens. The chocolate chips melt into the dough, the candy-coated chocolates add crunch and color, the pretzels bring saltiness, and the toffee bits create buttery caramel flavor.
Every bite tastes slightly different depending on the mix-ins you get.
Frosting and Festive Toppings
The frosting layer adds extra sweetness and softness, while crushed peppermint candies or holiday sprinkles give the bars a festive finish.
The peppermint also adds freshness that balances the richness.
Essential Tools for Perfect Cookie Bars
Must-Have Baking Equipment
You’ll need mixing bowls, a mixer, a spatula, and a 9×13 baking pan.
Helpful Tools for Easy Slicing and Decorating
Parchment paper makes removing and slicing the bars much easier.
An offset spatula helps spread frosting evenly.
Step-by-Step Santa’s Trash Cookie Bars Recipe
Mixing the Cookie Dough
Cream butter and sugars until fluffy, then mix in eggs and vanilla.
Adding the Holiday Mix-Ins
Fold in chocolate chips, candies, pretzels, and toffee bits gently.
Baking the Bars
Bake until edges are golden and center is just set.
Frosting and Decorating
Cool completely before frosting and adding peppermint or sprinkles.
Pro Tips for Soft and Chewy Cookie Bars
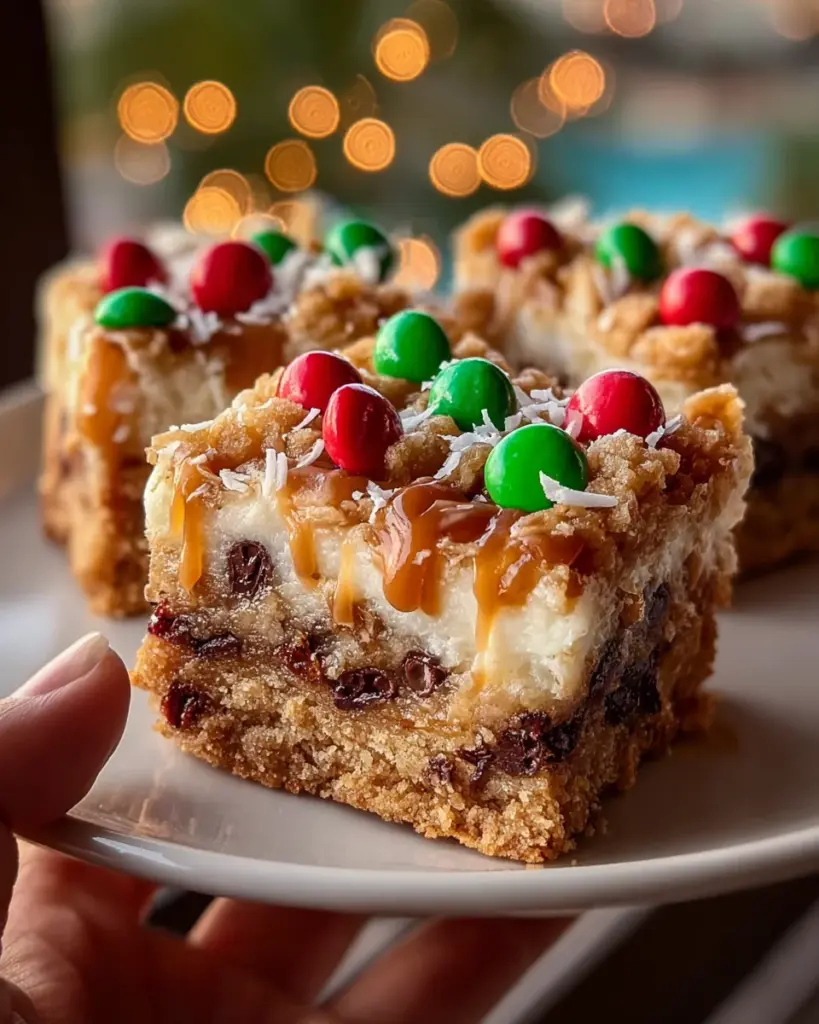
The best Santa’s Trash Cookie Bars should be thick, chewy, slightly gooey in the center, and packed with texture in every bite. Since these bars contain so many mix-ins, balance is important. You want enough crunch and candy to make them exciting without overwhelming the cookie base itself.
Preventing Dry or Overbaked Bars
One of the easiest ways to ruin cookie bars is overbaking them. Unlike traditional cookies, bars continue cooking slightly after they come out of the oven because of residual heat from the pan.
The center should still look just barely set when you remove them. If you wait until the middle looks completely firm, the bars can turn dry after cooling.
Brown sugar also helps keep the bars soft because it adds moisture and chewiness. That’s one reason this recipe uses more brown sugar than granulated sugar.
Another helpful tip is pressing the dough evenly into the pan. Uneven thickness can lead to overcooked edges and undercooked centers.
Balancing Sweet and Salty Flavors
Because these bars contain candy, chocolate, frosting, and toffee, the sweetness can become intense if there’s no contrast.
That’s where the pretzels and peppermint come in. The salty crunch from pretzels balances the rich sweetness, while peppermint adds freshness that cuts through the heavier flavors.
If you really love that sweet-salty contrast, sprinkle a tiny pinch of flaky sea salt over the finished bars before serving.
Common Mistakes and How to Avoid Them
Even though these bars are designed to feel fun and casual, a few small mistakes can still affect the texture.
Overmixing the Dough
Once the flour is added, mix only until combined. Overmixing develops gluten and can make the bars tougher instead of soft and chewy.
The dough should look thick and fully incorporated, but not overworked.
Uneven Baking or Hard Edges
If the dough is packed unevenly into the pan, some areas bake faster than others. Using an offset spatula or lightly greased hands helps smooth the dough into an even layer.
Lining the pan with parchment paper also helps protect the edges from overbrowning while making removal easier.
Variations and Creative Twists
One of the best things about Santa’s Trash Cookie Bars is how customizable they are. You can swap ingredients based on what you already have in the pantry.
Christmas Candy Explosion Version
For an even more over-the-top holiday version, try adding:
- Crushed candy canes
- White chocolate chips
- Mini marshmallows
- Holiday Oreos
- Peanut butter candies
These additions make the bars even more festive and colorful.
Peanut Butter and Oreo Additions
If you love peanut butter, swirl peanut butter into the dough or add peanut butter chips for extra richness.
Crushed Oreos also add amazing crunch and create a cookies-and-cream vibe that pairs surprisingly well with peppermint.
Serving and Presentation Ideas
These bars are meant to feel festive, fun, and slightly chaotic—in the best way possible.
Making the Bars Look Festive
Cut the bars into squares or rectangles and arrange them on a holiday platter. Extra crushed peppermint, sprinkles, or a drizzle of melted chocolate instantly makes them look bakery-worthy.
For holiday cookie boxes, smaller squares work especially well because the bars are rich and packed with mix-ins.
You can even stack them slightly unevenly for that homemade holiday dessert-table look.
Storage and Make-Ahead Tips
Because these bars contain frosting and candy toppings, proper storage helps maintain the best texture.
Keeping Cookie Bars Fresh
Store the bars in an airtight container at room temperature for up to 3 days, or refrigerate for up to 5 days.
If refrigerated, let them sit at room temperature for a few minutes before serving so the cookie base softens slightly.
These bars also freeze well. Wrap individual bars tightly and freeze for up to 2 months.
Conclusion Santa’s Trash Cookie Bars
Santa’s Trash Cookie Bars are the kind of dessert that fully embraces holiday fun. They’re messy, colorful, overloaded with mix-ins, and packed with every sweet-and-salty flavor combination you could want in one bite.
What makes them so irresistible is the contrast of textures. Chewy cookie dough, crunchy pretzels, melty chocolate, creamy frosting, and peppermint crunch all work together to create a dessert that’s playful and comforting at the same time.
They don’t require perfection or complicated decorating skills—just a willingness to have fun with holiday baking. And honestly, that’s exactly what makes them such a crowd favorite every year.
FAQs Santa’s Trash Cookie Bars
1. Can I use different candies?
Absolutely—this recipe is very customizable.
2. Do I have to frost the bars?
No, but the frosting adds extra softness and holiday flair.
3. Can I freeze cookie bars?
Yes, freeze tightly wrapped bars for up to 2 months.
4. Why are my bars dry?
They were likely overbaked.
5. Can I make these ahead for holiday parties?
Yes, they’re great for making 1–2 days in advance.
Print
Santa’s Trash Cookie Bars
Ingredients
1 cup unsalted butter, softened
1 cup brown sugar
1/2 cup granulated sugar
2 large eggs
2 teaspoons vanilla extract
2 1/4 cups all-purpose flour
1 teaspoon baking soda
1/2 teaspoon salt
1 cup semi-sweet chocolate chips
1 cup holiday candy-coated chocolates
1 cup mini pretzels, roughly crushed
1/2 cup toffee bits
1 cup cream cheese frosting or whipped topping
2 tablespoons crushed peppermint candies or holiday sprinkles
Instructions
1. Preheat the oven to 350°F and line a 9×13-inch baking pan with parchment paper.
2. Beat the softened butter, brown sugar, and granulated sugar until light and fluffy.
3. Mix in the eggs one at a time, then add the vanilla extract.
4. In a separate bowl, whisk together the flour, baking soda, and salt.
5. Add the dry ingredients to the wet ingredients and mix just until combined.
6. Fold in the chocolate chips, candy-coated chocolates, crushed pretzels, and toffee bits, saving a little for the top.
7. Press the dough evenly into the prepared pan and scatter the reserved mix-ins over the surface.
8. Bake for 24 to 30 minutes, until the edges are golden and the center is just set.
9. Cool the bars completely in the pan.
10. Spread the frosting or whipped topping over the cooled bars.
11. Finish with crushed peppermint candies or sprinkles.
12. Slice into bars and serve.