Strawberry Crunch Cheesecake Cones: A Sweet Delight Awaits!

Introduction to Strawberry Crunch Cheesecake Cones
Are you constantly on the lookout for a delightful dessert that doesn’t require hours in the kitchen? Look no further! Strawberry Crunch Cheesecake Cones are here to rescue your sweet tooth and impress your family. This no-bake treat combines smooth cheesecake filling with fresh strawberries all nestled in a crispy waffle cone. With just a handful of ingredients and minimal prep time, these cones make for the perfect quick solution for a busy day or a delightful dish for gatherings. Trust me, once you try these, they’ll become a must-have in your recipe rotation!
Why You’ll Love This Strawberry Crunch Cheesecake Cones
These Strawberry Crunch Cheesecake Cones are the ultimate dessert for busy moms and professionals. They are incredibly easy to whip up, taking just 20 minutes from start to finish. The combination of creamy cheesecake and fresh strawberries creates a delightful flavor explosion, perfect for satisfying your sweet cravings. Plus, they’re no-bake, which means less fuss and mess in the kitchen, making them a great choice for those hectic family evenings or last-minute gatherings!
Ingredients for Strawberry Crunch Cheesecake Cones
Gathering the right ingredients for Strawberry Crunch Cheesecake Cones is a simple task that can spark joy in your home. Each ingredient plays a key role in crafting these delightful treats, ensuring every bite is as delicious as the last. Here’s what you’ll need:
- Cream Cheese: The base of our cheesecake filling, offering that rich and creamy texture.
- Powdered Sugar: This sweetener dissolves easily, giving our mixture a smooth finish without grittiness.
- Vanilla Extract: A splash of this heavenly essence adds warmth and enhances the flavors beautifully.
- Heavy Cream: Whipping this cream lightens the filling, making it airy and delectable.
- Fresh Strawberries: Sweet and juicy, these beauties add a refreshing contrast and vibrant color.
- Crunchy Toppings: Think crushed graham crackers, nuts, or cereal for that perfect crunch in every bite.
- Waffle Cones: The crispy and sturdy vessel that holds all the delightful goodness of our cheesecake filling.
Feel free to get creative! You can substitute strawberries with other berries like blueberries or raspberries for a different twist. Also, if you’re looking to shave off calories, consider using lower-fat cream cheese and a sugar substitute. The exact quantities are available at the bottom of this article for your convenience and printing purposes!
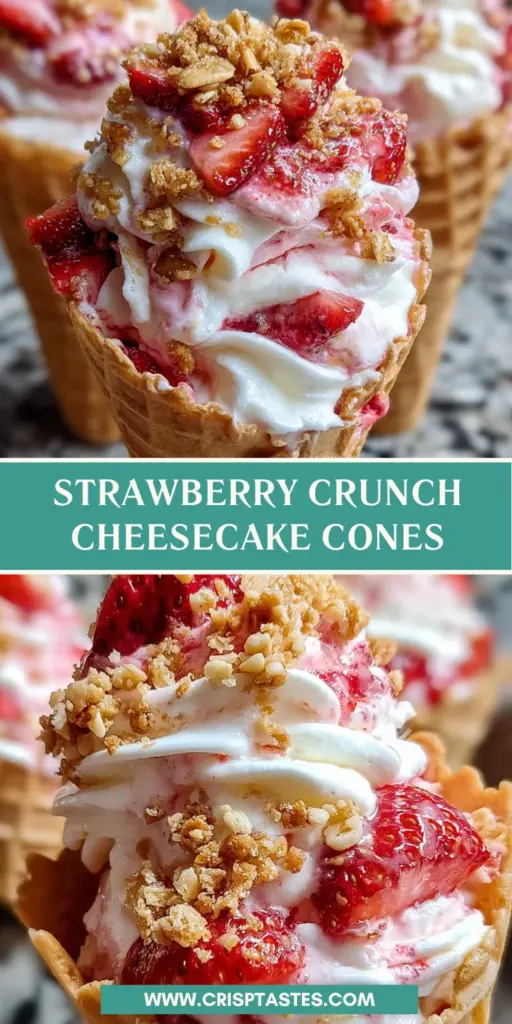
How to Make Strawberry Crunch Cheesecake Cones
Creating your own Strawberry Crunch Cheesecake Cones can be a joyful experience! The steps are straightforward but offer room for a bit of creativity. Follow along, and let’s make these delectable treats together!
Step 1: Prepare the Cheesecake Filling
Start by grabbing your softened cream cheese, powdered sugar, and vanilla extract. In a large bowl, beat the cream cheese with an electric mixer until it’s smooth and creamy.
After that, add the powdered sugar gradually. This helps prevent a sugar cloud in your kitchen! Finally, mix in the vanilla extract. The goal here is to achieve a luscious, creamy texture that will serve as the base of our filling. Don’t rush the process; the creaminess is vital for a delightful mouthfeel.
Step 2: Whip the Heavy Cream
Now, let’s make that filling light and airy! In a separate bowl, pour in your heavy cream. Using an electric mixer, whip it on high speed until stiff peaks form. This is the secret to elevating your cheesecake mixture!
Stiff peaks mean you can turn that bowl upside down without the cream falling out. It’s like magic! Just remember, with great power comes great responsibility; over-whipping can lead to butter, and we want fluffy, not chunky.
Step 3: Fold Whipped Cream Into Cheesecake Mixture
Here’s the folding part—picture it like tucking in a cozy blanket around the filling. Gently fold the whipped cream into the cheesecake mixture using a spatula. This step is crucial for keeping that light and airy texture we worked so hard to create.
Make sure to scrape the sides and bottom of the bowl, ensuring that everything is evenly incorporated without losing that precious volume. It’s like a gentle hug for your cheesecake!
Step 4: Add Crunchy Toppings
Now, let’s add some fun! It’s time to mix in those crunchy toppings. Whether you’re using crushed graham crackers, nuts, or your favorite cereal, this crunch provides a delightful texture contrast.
Incorporating these bits enhances the flavor profile, creating a symphony of textures in every bite. Just fold them in gently to maintain that lovely creaminess.
Step 5: Assemble the Cones
It’s time to bring everything together! Grab your waffle cones and, using a spoon or a piping bag, fill each cone with the cheesecake mixture.
Be generous—I often leave the tops spilling out for a more indulgent look! Once filled, beautifully arrange sliced fresh strawberries on top and sprinkle more crunchy goodness for that finishing touch. Voilà! Your Strawberry Crunch Cheesecake Cones are now ready to make someone’s day a little sweeter.
Tips for Success
- Always use softened cream cheese to avoid lumps in your filling.
- Chill your mixing bowl for whipping the cream; it helps achieve those stiff peaks quicker.
- Feel free to customize the crunchy toppings to match your family’s favorites!
- Assembly can get messy—keep some paper towels handy for easy clean-up.
- Make extra filling for a mini dessert parfait in a cup!
Equipment Needed
- Electric Mixer: A hand mixer works perfectly if you don’t have a stand mixer.
- Mixing Bowls: Use different sizes; glass bowls are great for holding cold mixtures.
- Spatula: A silicone spatula is ideal for folding the whipped cream gently.
- Piping Bag or Spoon: Use either for filling the cones; a spoon is a simple alternative.
- Chilled Serving Platter: Perfect for presenting your finished Strawberry Crunch Cheesecake Cones!
Variations
- For a chocolate twist, add cocoa powder to the cream cheese filling for a rich chocolate cheesecake.
- Try using different fruits like blueberries, raspberries, or even diced peaches to switch up the flavors.
- For a gluten-free option, replace waffle cones with gluten-free cones and use gluten-free crunchy toppings.
- Make a lighter version by using low-fat cream cheese and reducing the amount of sugar or substituting with a sweetener.
- Add a splash of lemon or lime juice to the cheesecake mixture for a refreshing citrus zing!
Serving Suggestions
- Pair your Strawberry Crunch Cheesecake Cones with a refreshing glass of lemonade or iced tea for a delightful summer treat.
- Serve them with a side of whipped cream or a drizzle of chocolate sauce for an extra indulgent touch.
- For a beautiful presentation, arrange the cones on a colorful platter and garnish with mint leaves.
FAQs about Strawberry Crunch Cheesecake Cones
Curious about making Strawberry Crunch Cheesecake Cones? Let’s tackle some common questions that might pop up as you embark on this sweet journey!
Can I make Strawberry Crunch Cheesecake Cones ahead of time?
Absolutely! You can prepare the cheesecake filling a day before and store it in the refrigerator. However, fill the cones just before serving to keep them crispy and delightful!
What can I use instead of strawberries?
If strawberries aren’t your jam, feel free to substitute them with other berries like blueberries, raspberries, or even sliced peaches for a fun twist!
How do I store leftover cheesecake filling?
Store any leftover cheesecake filling in an airtight container in the fridge for up to three days. It’s perfect for spreading on graham crackers or enjoying on its own!
What are the best toppings for these cones?
The sky’s the limit! I love using crushed graham crackers or nuts, but consider sprinkles, coconut flakes, or even mini chocolate chips for a delightful touch!
Can I make these Strawberry Crunch Cheesecake Cones gluten-free?
Definitely! Just opt for gluten-free waffle cones and ensure your crunchy toppings are also gluten-free, and you’re all set for a deliciously safe treat!
Final Thoughts
As I reflect on my journey with Strawberry Crunch Cheesecake Cones, I can’t help but smile. These whimsical treats share more than just flavor; they offer joy and laughter around the dinner table. The crunch of the waffle cone combined with the smooth cheesecake filling and fresh strawberries creates an experience that brings everyone together.
Whether it’s a quick weekday dessert or a delightful addition to a festive gathering, these cones always hit the mark. I hope you find the same happiness and satisfaction in making and sharing this recipe with your loved ones!
Print
Strawberry Crunch Cheesecake Cones
- Total Time: 20 minutes
- Yield: 6–8 cones 1x
- Diet: Vegetarian
Description
Strawberry Crunch Cheesecake Cones are a delightful treat combining creamy cheesecake filling and fresh strawberries in a crispy waffle cone.
Ingredients
- 8 oz cream cheese, softened
- 1/2 cup powdered sugar
- 1 teaspoon vanilla extract
- 1 cup heavy cream
- 1 cup fresh strawberries, sliced
- 1/2 cup crunchy toppings (crushed graham crackers, nuts, or cereal)
- 6–8 waffle cones, crispy and sturdy
Instructions
- Prepare the Cheesecake Filling: In a large bowl, beat softened cream cheese until smooth and creamy using an electric mixer. Gradually add powdered sugar and vanilla extract, continuing to mix until the batter is silky and evenly combined.
- Whip the Heavy Cream: In a separate chilled bowl, whip the heavy cream until stiff peaks form. This will add lightness and volume to your filling, creating that perfect fluffy cheesecake texture.
- Fold Whipped Cream Into Cheesecake Mixture: Gently fold the whipped cream into the cream cheese mixture using a spatula, careful not to deflate the mixture. This ensures your filling will be airy yet creamy and smooth.
- Add Crunchy Toppings: Mix in crushed graham crackers or your chosen crunchy bits into the filling, giving every bite that delightful texture contrast that defines Strawberry Crunch Cheesecake Cones.
- Assemble the Cones: Using a spoon or piping bag, carefully fill each waffle cone with the cheesecake mixture. Top each cone with sliced fresh strawberries and a sprinkle of extra crunchy topping to finish.
Notes
- For best results, chill the cones in the refrigerator before filling them.
- Feel free to substitute the fruits with other berries or toppings of your choice.
- The filled cones are best enjoyed fresh to maintain crispiness.
- Prep Time: 20 minutes
- Cook Time: 0 minutes
- Category: Dessert
- Method: No-bake
- Cuisine: American
Nutrition
- Serving Size: 1 cone
- Calories: 300
- Sugar: 16g
- Sodium: 170mg
- Fat: 22g
- Saturated Fat: 13g
- Unsaturated Fat: 7g
- Trans Fat: 0g
- Carbohydrates: 30g
- Fiber: 1g
- Protein: 4g
- Cholesterol: 55mg