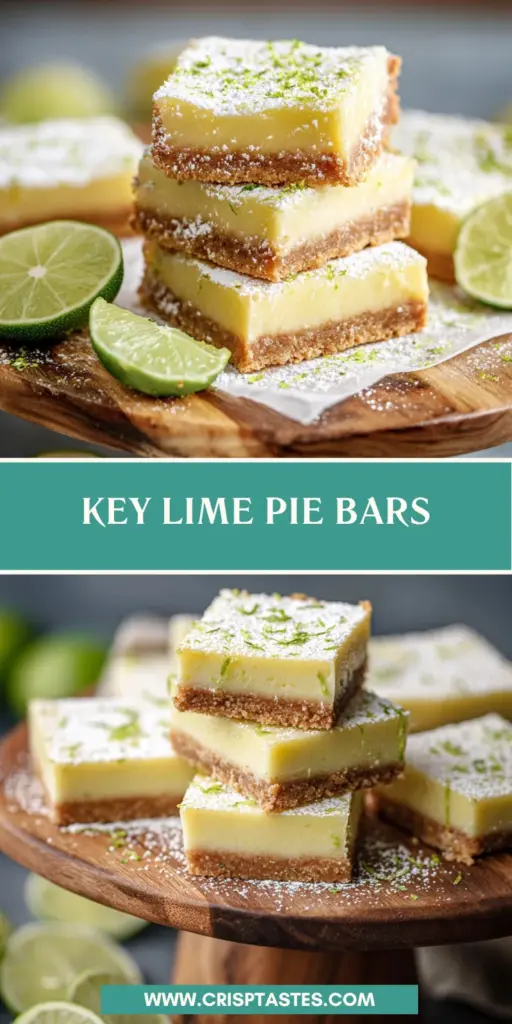
Key Lime Pie Bars: A Refreshing Summer Dessert Delight!

Introduction to Key Lime Pie Bars
When the summer sun starts to shine, I often find myself craving something bright and refreshing. That’s where my delicious Key Lime Pie Bars come into play! These bars are not only easy to whip up but also a delightful way to cool off. If you’re a busy mom or professional juggling daily tasks, you’ll appreciate how quick and satisfying this recipe is. Imagine sinking your teeth into a tangy key lime filling on a buttery graham cracker crust. Trust me, this dessert will brighten your day and have everyone begging for seconds!
Why You’ll Love This Key Lime Pie Bars
Key Lime Pie Bars are truly a summer treat you won’t want to miss. They’re not just delicious; they’re also incredibly easy to prepare! In under an hour, you can have a refreshing dessert that will impress your family and friends. Plus, the balanced sweetness and tang make every bite feel like a mini-vacation. Honestly, who doesn’t need a little culinary escape during a busy week? These bars are sure to become a family favorite!
Ingredients for Key Lime Pie Bars
Creating these Key Lime Pie Bars is simple, and the ingredients are pretty straightforward. Here’s what you’ll need:
- Graham cracker crumbs: The base of our bars, offering that quintessential crunch and sweetness. You can use pre-packaged crumbs or crush your own.
- Salted butter: It brings richness to the crust and balances the sweetness. I prefer salted butter for that extra flavor hit!
- Granulated sugar: Adds sweetness to the crust. Feel free to adjust this to taste if you prefer a less sweet treat.
- Sweetened condensed milk: This creamy goodness provides the luscious texture that makes the filling so tempting.
- Egg yolks: They help set the filling and create a velvety consistency. Make sure not to skip this, as it’s essential!
- Key lime juice: The star of the show! Its tartness gives the bars their signature tangy flavor. Freshly squeezed juice is fantastic, but bottled works in a pinch.
- Key lime zest: Adds an extra punch of flavor without being too intense. Plus, it brings a lovely color and fragrance!
- Powdered sugar (optional): This is for dusting on top, giving your bars that little extra sweetness and a nice presentation.
- Additional zest (optional): Sprinkle some extra lime or lemon zest on top for a fresh twist that looks great when serving.
For exact measurements, you can find those at the bottom of the article, alongside a handy printable version. Trust me, gathering these ingredients will set you up for a delightful kitchen adventure!
How to Make Key Lime Pie Bars
Now that we’ve gathered our ingredients, let’s dive into making these delightful Key Lime Pie Bars! It’s easier than you might think, and I’ll guide you through each step with a sprinkle of love and a dash of humor.
Step 1: Prepare the Crust
Start by preheating your oven to 375°F. While that’s warming up, grab a small bowl and combine your graham cracker crumbs, melted butter, and sugar. Mix until everything’s well combined. The crust is the foundation, so make sure it feels a bit damp but not soupy.
Next, take your mixture and press it into the bottom of an 8 or 9-inch square baking pan. You want to pack it down firmly, so your bars don’t crumble apart later. I like to use the bottom of a measuring cup or a flat spatula—whatever works best for you!
Step 2: Bake the Crust
Pop that crust into the preheated oven and bake it for about 7 minutes. This step just sets the crust and gives it a little toasty flavor. Once it’s golden and smells amazing, remove it from the oven and let it cool while you prepare the filling. Take a moment to admire your hard work; you’ve got this!
Step 3: Make the Key Lime Filling
Now, let’s get to the heart of these Key Lime Pie Bars—the filling! In a medium bowl, whisk together the sweetened condensed milk, egg yolks, key lime juice, and zest. Mix until everything is smooth and well incorporated.
The filling should be bright and velvety. If you like a little extra zing, don’t hold back on that lime zest! It’s what makes this dessert shine. Plus, can you believe how fast and simple this is? You’ll be a kitchen rock star in no time!
Step 4: Bake the Filling
Preheat your oven to 350°F now. Pour the luscious key lime filling over your cooled crust and smooth it out evenly. Bake it for about 25 minutes until the filling is set with just a slight jiggle in the center. Trust me, this little bit of jiggling means perfection.
Once it’s done, let it cool on the counter for a bit. There’s something so rewarding about watching your creation bake away—like a mini oven magic show!
Step 5: Chill and Serve
After letting the bars cool, pop them into the refrigerator to chill completely. This is the hardest part, but it’s worth the wait! Once they’re chilled, dust them with powdered sugar and sprinkle some extra zest on top for that wow factor.
Cut the bars into squares, serve, and watch your family devour them. These Key Lime Pie Bars don’t just taste great; they look stunning too! Enjoy every refreshing bite, knowing you’ve made something magical in your kitchen.
Tips for Success
- Make sure to press the crust down firmly to keep it from crumbling.
- Use freshly squeezed key lime juice for an authentic taste that sings!
- Don’t overbake the filling; a slight jiggle means it’s perfectly set.
- If your family loves the tartness, add extra key lime zest!
- These bars keep well in the fridge, making them perfect for make-ahead desserts.
Equipment Needed
- 8-inch or 9-inch square baking pan: You can use a glass or metal pan; both work well.
- Mixing bowls: A medium bowl for the filling and a small one for the crust.
- Whisk: Perfect for blending the filling—if you don’t have one, a fork will do.
- Measuring cups and spoons: Essential for getting those ingredients just right!
- Parchment paper: Helps with easy removal of the bars; foil works in a pinch too.
Variations on Key Lime Pie Bars
- Gluten-Free Option: Substitute graham cracker crumbs with gluten-free crumbs or almond flour for a delicious gluten-free treat.
- Coconut Twist: Add toasted coconut flakes to the crust or sprinkle on top for an exotic flavor that pairs beautifully with lime.
- Berry Blast: Swirl in fresh blueberries or raspberries into the filling before baking for a fruity twist and vibrant color.
- Vegan Version: Use coconut cream instead of sweetened condensed milk and flax eggs as a binder for a plant-based alternative.
- Key Lime Pie Cheesecake Bars: Blend in some cream cheese with the filling for a richer, creamier dessert experience!
Serving Suggestions for Key Lime Pie Bars
- Fresh Berries: Serve with a side of mixed berries for a sweet and colorful contrast.
- Whipped Cream: A dollop of freshly whipped cream adds creaminess and balances the tartness.
- Mint Leaves: Garnish with fresh mint leaves for a pop of color and refreshing aroma.
- Coconut Water: Pair your bars with chilled coconut water for a tropical twist.
- Presentation: Cut into neat rectangles and serve on a brightly colored platter for an eye-catching display!
FAQs about Key Lime Pie Bars
Here are some common questions I hear about my Key Lime Pie Bars. I hope these answers help while you’re whipping up this delightful dessert!
Can I use regular limes instead of key limes? Absolutely! While key limes offer that unique tartness, regular limes will still create a delicious filling. Just adjust the zest and juice to your taste.
How do I store the Key Lime Pie Bars? These bars can be kept in an airtight container in the refrigerator for up to five days. They actually get better as they chill and settle!
Can I freeze Key Lime Pie Bars? Yes! Just wrap them tightly and store them in the freezer. Thaw in the fridge before serving for the best texture.
What can I do if the filling is too tart? If you find the flavor a bit sharp for your taste, drizzle some honey or serve with sweetened whipped cream. It balances the tartness beautifully!
Can I make these bars ahead of time? Definitely! In fact, making them a day in advance allows the flavors to meld, making for an even tastier dessert. Perfect for summer parties or last-minute gatherings!
Final Thoughts
In a world filled with endless responsibilities, creating Key Lime Pie Bars offers a slice of joy and relaxation. Each bite is a reminder of sunny afternoons, bright flavors, and sweet moments with loved ones. I hope this recipe becomes your go-to treat, not just for summer but for any occasion that calls for a little sunshine in your life. Baking these bars is not only about feeding your family; it’s about sharing love and laughter. So, gather your ingredients, turn on your favorite tunes, and let these delightful bars bring a taste of paradise to your table!
Print
Key Lime Pie Bars
- Total Time: 52 minutes
- Yield: 16 bars 1x
- Diet: Vegetarian
Description
Key Lime Pie Bars are a refreshing summer dessert featuring a sweet and tart key lime filling atop a buttery graham cracker crust.
Ingredients
- 1½ cups graham cracker crumbs
- 6 tablespoons salted butter, melted
- ⅓ cup granulated sugar
- 14 ounces sweetened condensed milk (1 can)
- 5 egg yolks
- ½ cup key lime juice
- 2 tablespoons key lime zest
- Powdered sugar (optional)
- 2 tablespoons key lime and/or lemon zest (optional)
Instructions
- Preheat oven to 375°F.
- Spray an 8-inch or 9-inch square pan with cooking spray and line with parchment paper.
- Combine graham cracker crumbs, melted butter, and sugar in a small bowl and stir until combined.
- Press the graham cracker crumb mixture into the bottom of the prepared pan and press down firmly. Use the bottom of a measuring cup to really pack it in.
- Bake the graham cracker crust for 7 minutes. Remove from the oven and let cool.
- Preheat the oven to 350°F.
- Whisk the sweetened condensed milk, egg yolks, key lime juice, and zest together in a medium bowl.
- Pour the key lime filling over the cooled crust and bake for 25 minutes.
- Let the bars chill before serving.
- Dust with powdered sugar and sprinkle with additional zest if desired. Cut into bars, serve, and enjoy!
Notes
- For a more pronounced lime flavor, use more zest in the topping.
- These bars can be made a day in advance and kept in the refrigerator.
- Prep Time: 20 minutes
- Cook Time: 32 minutes
- Category: Dessert
- Method: Baking
- Cuisine: American
Nutrition
- Serving Size: 1 bar
- Calories: 200
- Sugar: 16g
- Sodium: 150mg
- Fat: 10g
- Saturated Fat: 6g
- Unsaturated Fat: 3g
- Trans Fat: 0g
- Carbohydrates: 24g
- Fiber: 0g
- Protein: 2g
- Cholesterol: 100mg