Loaded Brownie Cheesecake Cup

Introduction to Loaded Brownie Cheesecake Cup
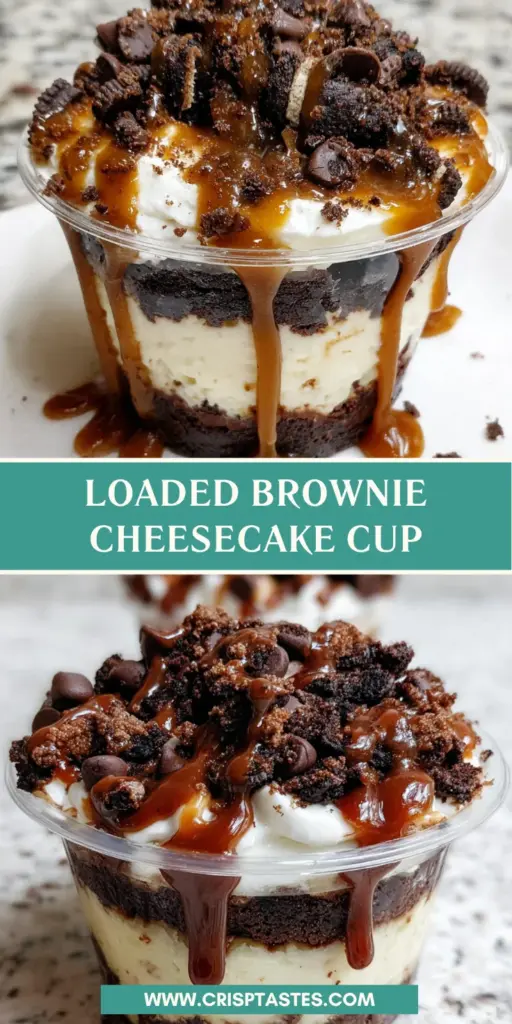
As a busy mom, I know how important it is to have quick, delightful treats on hand. The Loaded Brownie Cheesecake Cup ticks all the boxes—forged from the perfect blend of decadent brownie and smooth cheesecake, they are sure to put a smile on everyone’s face. Whether you’re looking to impress guests or just craving a little indulgence, these cups are a go-to solution. Plus, they’re a fantastic way to sneak in a bit of joy on those hectic days. So, let’s dive into this irresistible recipe that’s a delightful adventure in every bite!
Why You’ll Love This Loaded Brownie Cheesecake Cup
Let me tell you, these Loaded Brownie Cheesecake Cups are every bit as delicious as they sound! They’re super easy to whip up, making them a perfect treat for busy schedules. In just 30 minutes of prep time, you’ll have warm, delightful cups fresh from your oven. Plus, the rich, creamy layers will charm your taste buds, giving you that warm hug of comfort you deserve after a long day. What’s not to love?
Ingredients for Loaded Brownie Cheesecake Cup
Gathering the right ingredients for these Loaded Brownie Cheesecake Cups is half the fun! Here’s what you’ll need for this decadent dessert:
- Unsalted butter: This adds richness to the brownie base.
- Granulated sugar: Provides sweetness; it’s the key to that delightful flavor in both layers.
- Large eggs: Essential for binding and providing structure to the brownie and cheesecake.
- Vanilla extract: A splash enhances the flavor remarkably.
- Unsweetened cocoa powder: This is where the chocolatey goodness comes from!
- All-purpose flour: Helps give the brownies their desired texture and stability.
- Fine salt: Just a pinch brings out the flavors beautifully.
- Semisweet chocolate chips: These melt perfectly into the brownie, adding pockets of chocolatey bliss.
For the cheesecake layer, you’ll need:
- Cream cheese: Softened to ensure a smooth and creamy texture.
- Sour cream: Adds a lovely tanginess and richness to the cheesecake filling.
- Mini chocolate chips: For that extra touch of sweetness on top.
- Crushed chocolate sandwich cookies: These make for a fun, crunchy topping that complements the dessert.
Don’t forget optional toppers like caramel sauce and hot fudge for drizzling, and whipped cream for that extra charm! You’ll find the exact measurements and a handy print option at the bottom of the article, ready for your kitchen adventures.
How to Make Loaded Brownie Cheesecake Cup
Step 1: Prepare Your Muffin Pan
First things first, preheat your oven to 350 degrees F. This step gets your kitchen warming up, setting the stage for baking magic. Line a muffin pan with adorable paper liners, which not only make for easy removal but also add a fun pop of color. Trust me; this little detail makes serving easier and looks delightful, too!
Step 2: Mix the Brownie Batter
In a large mixing bowl, whisk together the melted unsalted butter and granulated sugar until everything is glossy and well combined. Then, add two large eggs and a teaspoon of vanilla extract, mixing until smooth. Next, fold in the unsweetened cocoa powder, all-purpose flour, and a pinch of fine salt until just combined. The batter should be thick and absolutely mouthwatering. Don’t forget to stir in the semisweet chocolate chips; they’re a game changer!
Step 3: Bake the Brownie Base
Now it’s time to create that delicious base! Spoon about 1 to 1.5 tablespoons of brownie batter into each muffin cup. You want them to be just about halfway full. Bake for approximately 8 minutes, just until they’re slightly set. The aroma that fills your home will have your family gathered in the kitchen, eager for treats!
Step 4: Make the Cheesecake Filling
While the brownie base is baking, let’s whip up that dreamy cheesecake filling. In another bowl, beat the softened cream cheese and granulated sugar until it’s smooth and creamy. Then add in one egg, ¼ cup of sour cream, a teaspoon of vanilla extract, and another pinch of fine salt. Mix until everything is just combined. This is the moment where your kitchen turns into a cozy corner, with a sweet scent wafting about!
Step 5: Assemble the Cups
Once your brownie bases have baked to perfection, it’s time to assemble! Carefully spoon the cheesecake filling over each brownie base, filling the liners nearly to the top. Don’t be shy! Now, sprinkle mini chocolate chips and crushed chocolate sandwich cookies over the tops, pressing them in lightly. These toppings not only look amazing but provide that delightful crunch!
Step 6: Bake Until Perfectly Set
It’s time to bake the assembled cups! Pop them back into the oven and bake until the edges are set but the centers still have a slight wobble, which should take about 16 to 18 minutes. Keep a close eye during this step—it’s hard, I know, but they’ll emerge beautifully puffed with their edges brown and inviting!
Step 7: Cool and Chill
After baking, let the Loaded Brownie Cheesecake Cups cool in the pan for about 20 minutes. This part is crucial, so don’t skip it! Then, gently transfer them to a wire rack to cool completely. For the ultimate indulgence, pop them in the refrigerator for at least 2 hours. Trust me; this chilling step allows those decadent flavors to mingle and intensify. When you finally serve them, the joy on your loved ones’ faces will be worth every minute!
Tips for Success
- Make sure your cream cheese is well softened for easy blending.
- Measure ingredients accurately for the best results.
- Don’t overmix the cheesecake filling; a few lumps are okay!
- For a fun twist, experiment with different toppings like nuts or fresh fruit.
- Use a toothpick to test the brownies; it should come out with a few moist crumbs.
Equipment Needed
- Muffin pan: Essential for shaping your Loaded Brownie Cheesecake Cups; a silicone mold can be a fun alternative.
- Mixing bowls: Use both large and medium sizes for preparing the brownie and cheesecake layers.
- Whisk and spatula: Perfect for blending ingredients smoothly and folding in those yummy chocolate chips.
- Cooling rack: A must-have for cooling your baked treats; a large plate works too!
Variations of Loaded Brownie Cheesecake Cup
- Nutty Delight: Add chopped nuts like walnuts or pecans to the brownie batter for extra crunch and flavor.
- Flavorful Swaps: Experiment with flavored extracts such as almond or hazelnut instead of vanilla for a unique twist.
- Gluten-Free Option: Substitute all-purpose flour with a gluten-free baking mix to cater to dietary needs without sacrificing flavor.
- Cheesecake Flavors: Blend in fruit purees or chocolate syrup to the cheesecake layer for a fruity or chocolatey burst.
- Vegan Style: Use plant-based butter, flaxseed eggs, and dairy-free cream cheese to create a delicious vegan version.
Serving Suggestions for Loaded Brownie Cheesecake Cup
- Pair with a scoop of vanilla ice cream for that delightful warm and cold contrast.
- Serve alongside fresh berries for a refreshing balance of sweetness.
- Drizzle with additional caramel and hot fudge for an extra indulgent touch.
- Garnish with a dollop of whipped cream to create a beautiful presentation.
- Accompany with a rich coffee or milk for a cozy dessert experience.
FAQs about Loaded Brownie Cheesecake Cup
Can I make these Loaded Brownie Cheesecake Cups ahead of time?
Absolutely! These treats can be prepared a day in advance and stored in the refrigerator. Just drizzle them with sauce and add whipped cream right before serving for that fresh touch.
What should I do if my brownie base rises too high?
If your brownie base puffs up too much, it might be that the baking time or oven temperature was slightly off. Keep an eye on your cups during the final bake, ensuring they’re removed when the edges are set but the centers still have a slight wobble.
How do I store leftovers from these Loaded Brownie Cheesecake Cups?
Store any leftovers in an airtight container in the refrigerator. They can last up to five days—if they last that long! Just make sure to let them come to room temperature before serving.
Can I substitute ingredients in the cheesecake layer?
Definitely! If you’re looking for a lighter cheesecake, try using Greek yogurt instead of sour cream. You can even use flavored cream cheeses for a twist.
What’s the best way to serve these cups for a party?
For a fun presentation, assemble them on a decorative platter. Add colorful toppings like fresh berries or chocolate shavings for a beautiful display. Trust me, they’ll be the star of your dessert table!
Final Thoughts
Every bite of these Loaded Brownie Cheesecake Cups is like a mini celebration of flavor! They’re not just treats; they’re memories waiting to be made, whether you’re sharing them at a family gathering or enjoying a quiet night in. The joy of creating something so delicious in your own kitchen brings warmth and satisfaction. Plus, it’s always a delight to see everyone’s smiles when they take that first bite. So, gather your loved ones, bring out these irresistible cups, and let the magic unfold. Trust me, your heart (and your taste buds) will thank you!
Print
Loaded Brownie Cheesecake Cup
- Total Time: 2 hours 30 minutes
- Yield: 12 servings 1x
- Diet: Vegetarian
Description
This Loaded Brownie Cheesecake Cup is an irresistibly delicious treat that combines rich brownie with a creamy cheesecake layer, topped with mini chocolate chips and crushed cookies.
Ingredients
- 6 tbsp unsalted butter, melted
- 3/4 cup granulated sugar
- 2 large eggs
- 1 tsp vanilla extract
- 1/2 cup unsweetened cocoa powder
- 1/2 cup all-purpose flour
- 1/4 tsp fine salt
- 1/2 cup semisweet chocolate chips
- 12 oz cream cheese, softened
- 1/2 cup granulated sugar
- 1 large egg
- 1/4 cup sour cream
- 1 tsp vanilla extract
- pinch fine salt
- 1/3 cup mini chocolate chips
- 1/2 cup crushed chocolate sandwich cookies
- caramel sauce for drizzling
- hot fudge sauce for drizzling
- whipped cream for serving
Instructions
- Heat oven to 350 degrees F and line a 12 cup muffin pan with paper liners.
- Whisk melted butter and sugar until glossy, then whisk in eggs and vanilla.
- Fold in cocoa powder, flour, and salt just until combined, then fold in chocolate chips.
- Portion about 1 to 1.5 tbsp brownie batter into each liner and bake for 8 minutes to slightly set.
- Beat cream cheese and sugar until smooth, then beat in the egg. Mix in sour cream, vanilla, and salt until just combined.
- Spoon cheesecake filling over par-baked brownie bases, filling liners nearly to the top.
- Sprinkle mini chocolate chips and crushed cookies over the tops, pressing lightly.
- Bake until edges are set and centers are still slightly wobbly, about 16 to 18 minutes.
- Cool in pan for 20 minutes, then transfer to a rack to cool completely and refrigerate for at least 2 hours before serving.
- Drizzle with caramel and hot fudge and add whipped cream if desired.
Notes
- Ensure the cream cheese is softened for easy mixing.
- Allow the cups to cool completely before refrigerating.
- Can be topped with additional toppings of choice.
- Prep Time: 30 minutes
- Cook Time: 30 minutes
- Category: Dessert
- Method: Baking
- Cuisine: American
Nutrition
- Serving Size: 1 cup
- Calories: 350
- Sugar: 25g
- Sodium: 180mg
- Fat: 20g
- Saturated Fat: 10g
- Unsaturated Fat: 8g
- Trans Fat: 0g
- Carbohydrates: 40g
- Fiber: 2g
- Protein: 5g
- Cholesterol: 60mg