Mini Easter Cheesecakes

Introduction to Mini Easter Cheesecakes
As the vibrant colors of spring bloom around us, it’s the perfect time for delightful treats like Mini Easter Cheesecakes! These tiny bites of creamy goodness are not just easy to whip up, but they also bring a touch of celebration to any gathering. Perfect for busy moms and professionals, this recipe provides a quick solution to satisfy that sweet craving without overwhelming your schedule. Plus, they’re a surefire way to impress your loved ones, making any dining table feel festive. Join me on this journey to cheesecake bliss!
Why You’ll Love This Mini Easter Cheesecakes
These Mini Easter Cheesecakes are not just a dessert; they’re a celebration of ease and flavor! With a simple, fuss-free prep, you can have them ready in no time, satisfying your sweet tooth without the stress. Their creamy texture and subtle hints of vanilla and lemon create an irresistible profile that everyone will adore. Perfectly portioned, they’re delightful bites that make any gathering feel special while keeping you worry-free!
Ingredients for Mini Easter Cheesecakes
Gathering the right ingredients is a crucial step to create these delightful Mini Easter Cheesecakes. Each element plays a unique role in crafting that creamy, dreamy texture. Here’s what you’ll need:
- Graham cracker crumbs: These provide the crunchy, flavorful base that contrasts beautifully with the smooth filling.
- Sugar: A hint of sweetness enhances the flavors, balancing the richness of the cream cheese.
- Melted butter: This binds the crumbs together, adding a lovely richness to the crust.
- Cream cheese: The star of the show, delivering that signature creamy and tangy flavor we adore in cheesecakes.
- Vanilla extract: Just a dash elevates the overall flavor, adding warmth and depth to the filling.
- Lemon juice: A splash brightens everything up, cutting through the richness with a refreshing zing.
- Large eggs: They provide structure; adding them carefully helps maintain the smoothness of the filling.
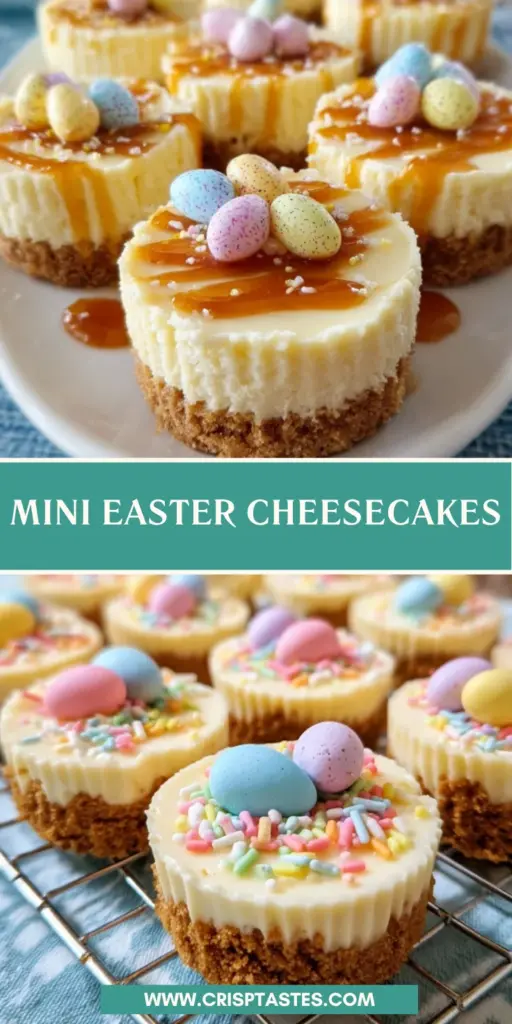
- Optional decorations: Pastel sprinkles or mini chocolate eggs can add a festive touch that’s perfect for Easter celebrations!
For exact measurements of each ingredient, check the bottom of the article where they are available for printing. Happy baking!
How to Make Mini Easter Cheesecakes
Now that you’ve gathered all your ingredients, let’s dive into the fun part—making these Mini Easter Cheesecakes! With clear steps and some helpful tips, you’ll be a baking star in no time. Let’s get started!
Step 1: Preheat the Oven and Prepare Muffin Pan
The first thing you want to do is preheat your oven to 160°C (or 320°F). This temperature ensures a gentle bake, which keeps our cheesecakes creamy without burning them. While that heats up, line your muffin pan with cupcake liners; this makes cleanup a breeze and helps with easy removal later. Trust me, no one likes wrestling with stuck cheesecakes!
Step 2: Prepare the Crust
In a medium bowl, combine your graham cracker crumbs, sugar, and melted butter. Mix until it’s crumbly and cohesive. Once that’s done, take a tablespoon and press this mixture firmly into the bottom of each cupcake liner. It should form a solid base to hold all that delicious filling. Don’t skip this part! A well-pressed crust keeps everything together beautifully.
Step 3: Make the Cheesecake Filling
Time to whip up the filling! In a separate large bowl, use an electric mixer to beat your cream cheese until it’s smooth and creamy. This step is crucial—starting with room temperature cream cheese prevents lumps. Add in your sugar, vanilla extract, and lemon juice, mixing until everything is well combined and luscious. You should be smelling that heavenly vanilla scent already!
Step 4: Combine Ingredients and Add Eggs
Now, let’s make it even more delicious. With the mixer on low speed, add the eggs one at a time. Be gentle; overmixing can lead to cracks in your cheesecakes, and we want them to look perfect! Just blend until they’re incorporated, and you’re ready to go.
Step 5: Fill and Bake
Using a spoon, carefully fill each cupcake liner with your cheesecake mixture, about three-quarters full. This way, they have space to rise. Bake them in your preheated oven for about 18–20 minutes. The edges should be set, while the centers remain slightly jiggly — that’s where the magic happens!
Step 6: Cooling and Chilling
Once they’re out of the oven, let your mini cheesecakes cool on the countertop for about 10 minutes. Then, transfer them to the refrigerator to chill for at least 2 hours, or until they’re firm. The chilling time is essential. It gives the flavors a chance to meld and that creamy texture to shine!
Step 7: Decorating Your Mini Cheesecakes
Now it’s time to bring some festive flair! If you’d like, add pastel sprinkles or mini chocolate eggs on top of each cheesecake before serving. This little touch makes all the difference in how delightful they look on your table, and let’s be honest, it’s Easter—who wouldn’t want to munch on something so cute?
Tips for Success
- Make sure your cream cheese is at room temperature for a smooth filling.
- Don’t overbeat the eggs, or your cheesecakes may crack during baking.
- Chill your mini cheesecakes long enough for the best texture—you’ll thank me later!
- Use quality vanilla extract; it truly elevates the flavor.
- Feel free to get creative with toppings; they add fun and festivity!
Equipment Needed
- Muffin pan: Essential for shaping your mini cheesecakes; a silicone mold works great, too.
- Cupcake liners: These simplify removal; you can use parchment paper if needed.
- Electric mixer: For creamy filling; a whisk can work if you’re feeling ambitious!
- Mixing bowls: Use at least two—one for the crust and one for the filling.
- Measuring cups and spoons: Precision is key for tasty results!
Variations of Mini Easter Cheesecakes
- Chocolate Mini Cheesecakes: Incorporate melted chocolate into the cheesecake filling for a rich chocolate twist.
- Fruit-Flavored Cheesecakes: Add pureed strawberries, blueberries, or raspberries to the filling for a fruity flavor.
- Gluten-Free Option: Substitute graham cracker crumbs with gluten-free biscuits to create a gluten-free crust.
- Vegan Cheesecakes: Use cashew cream or silken tofu instead of cream cheese, and skip the eggs for a delicious vegan twist.
- Caramel Swirl Cheesecakes: Drizzle caramel sauce into the filling before baking for a decadent touch!
Serving Suggestions
- Pair with a fresh fruit salad for a refreshing contrast.
- Serve alongside a light lemon or berry sorbet to complement the cheesecake flavors.
- A dollop of whipped cream enhances the festive look and taste.
- Present on a colorful platter for a cheerful celebration vibe!
- Accompany with a sweet iced tea or a glass of bubbly lemonade for a delightful drink.
FAQs about Mini Easter Cheesecakes
Can I make Mini Easter Cheesecakes ahead of time?
Absolutely! These mini cheesecakes can be made a day in advance. Just store them in the refrigerator until you’re ready to serve. This way, you can relax and enjoy your holiday celebrations without any last-minute stress.
What can I use instead of cream cheese?
If you’re looking for a dairy-free option, you can use cashew cream or silken tofu blended until smooth. These alternatives will give you a creamy texture without compromising on flavor!
Is it okay if my Mini Easter Cheesecakes are slightly jiggly in the center after baking?
Yes! A slight jiggle in the center is perfectly normal. This means they are still creamy and will firm up nicely in the refrigerator. Just ensure the edges are set.
Can I freeze Mini Easter Cheesecakes?
You can freeze these delectable bites, but I recommend doing so without the toppings. Wrap them tightly in plastic wrap or foil and store them in an airtight container. Thaw in the fridge before serving.
How can I make these cheesecakes healthier?
For a healthier twist, consider using reduced-fat cream cheese or Greek yogurt instead of regular cream cheese. You can also reduce the sugar or use a natural sweetener to lighten them up while still keeping the delicious flavor intact.
Final Thoughts on Mini Easter Cheesecakes
Creating these Mini Easter Cheesecakes is like wrapping your loved ones in a warm, creamy hug. They’re not just desserts; they’re little moments of joy that bring smiles to the table. The ease of preparation means you can spend more time with family and less time in the kitchen, which is a win in my book! Plus, the playful decorations add a fun touch to your celebrations. So, whether it’s Easter or just a spring gathering, these delightful treats will surely be the highlight, creating sweet memories one bite at a time!
Print
Mini Easter Cheesecakes
- Total Time: 2 hours 40 minutes
- Yield: 12 mini cheesecakes 1x
- Diet: Vegetarian
Description
Mini Easter Cheesecakes are irresistibly creamy desserts perfect for the holiday season, featuring a graham cracker crust and a luscious cream cheese filling.
Ingredients
- 1 cup graham cracker crumbs
- 3 tablespoons sugar
- 3 tablespoons melted butter
- 16 oz cream cheese, room temperature
- ½ cup sugar
- 1 teaspoon vanilla extract
- 1 teaspoon lemon juice
- 2 large eggs
- Optional: pastel sprinkles or mini chocolate eggs for decoration
Instructions
- Preheat oven to 160°C. Line muffin pan with cupcake liners for easy removal.
- In a bowl, mix graham cracker crumbs, sugar, and melted butter. Press into bottom of each liner.
- In another bowl, beat cream cheese until smooth using an electric mixer.
- Add sugar, vanilla, and lemon juice to cream cheese. Beat until creamy and fully combined.
- Add eggs one at a time, mixing gently. Do not overbeat to avoid cracking.
- Spoon filling over graham cracker crust in liners. Fill about ¾ full.
- Bake for 18–20 minutes until edges are set but centers slightly jiggly.
- Let cheesecakes cool on counter for 10 minutes, then transfer to refrigerator.
- Chill mini cheesecakes for at least 2 hours or until firm.
- Decorate with pastel sprinkles, mini chocolate eggs or whipped cream. Serve chilled.
Notes
- Ensure cream cheese is at room temperature for easier mixing.
- Do not overfill the liners to prevent overflow during baking.
- These cheesecakes can be made a day in advance.
- Prep Time: 20 minutes
- Cook Time: 20 minutes
- Category: Dessert
- Method: Baking
- Cuisine: American
Nutrition
- Serving Size: 1 mini cheesecake
- Calories: 200
- Sugar: 10g
- Sodium: 150mg
- Fat: 12g
- Saturated Fat: 7g
- Unsaturated Fat: 3g
- Trans Fat: 0g
- Carbohydrates: 18g
- Fiber: 1g
- Protein: 3g
- Cholesterol: 60mg