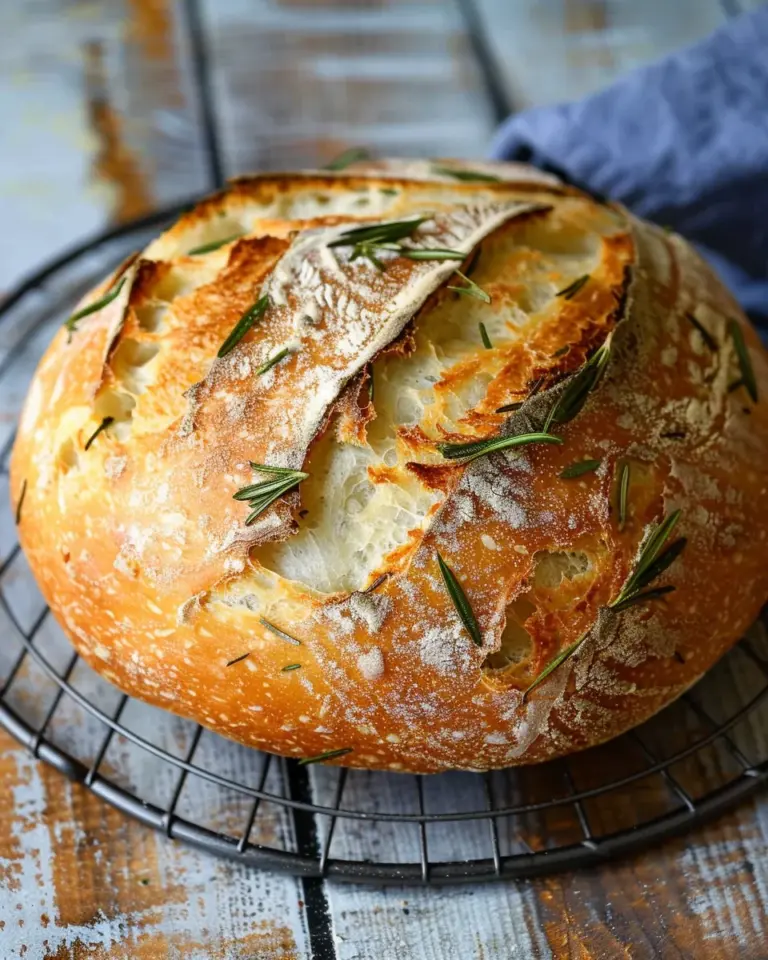
Sourdough Pizza Bread

Introduction to Sourdough Pizza Bread
Have you ever craved the comforting flavors of pizza but wanted something more wholesome? That’s where Sourdough Pizza Bread comes in! This delightful fusion brings the savory, cheesy goodness of your favorite pizza into a warm, homemade bread. It’s perfect for those busy weeknights when you want to impress your loved ones with minimal effort. With just a bit of planning, you can whip up this scrumptious treat that not only satisfies your cravings but also elevates your pizza game. Trust me, it’s a game-changer for any pizza lover!
Why You’ll Love This Sourdough Pizza Bread
This Sourdough Pizza Bread is a delightful combination of flavor, texture, and convenience. It’s easy to make, even for busy moms like us! The slow fermentation process adds a rich taste that store-bought options just can’t match. Plus, it fills your home with a mouthwatering aroma. Whether enjoyed as a standalone snack or alongside your favorite toppings, this bread will surely be a hit with family and friends!
Ingredients for Sourdough Pizza Bread
Gathering the right ingredients is key to making your Sourdough Pizza Bread shine. Here’s what you’ll need:
- Warm water: Provides hydration to the dough, helping it develop the right texture.
- Active sourdough starter: This is the heart of your bread, giving it that lovely tang and airy rise.
- Kosher salt: Enhances the flavor and strengthens the dough. Avoid table salt if possible, as it can be overly salty.
- Pizza seasoning: A blend of herbs like oregano and garlic powder that infuses your bread with delightful pizza flavors.
- Bread flour: This gives the bread its chewy texture, ideal for an exquisite crust.
- Pepperoni slices: Bring that authentic pizza vibe right into your loaf. If you prefer, you can swap in veggies or other meats.
- Low-moisture mozzarella cheese: Melts beautifully, adding a stretchy texture. Try substituting with a dairy-free option if you’re wanting a vegan twist!
- Parmesan cheese: Adds a savory depth. You can use nutritional yeast for a non-dairy flavor booster.
- Rice flour: Used to dust your proofing basket, preventing the dough from sticking.
- Ice cubes: These are for steaming purposes during baking, helping achieve that perfect crust.
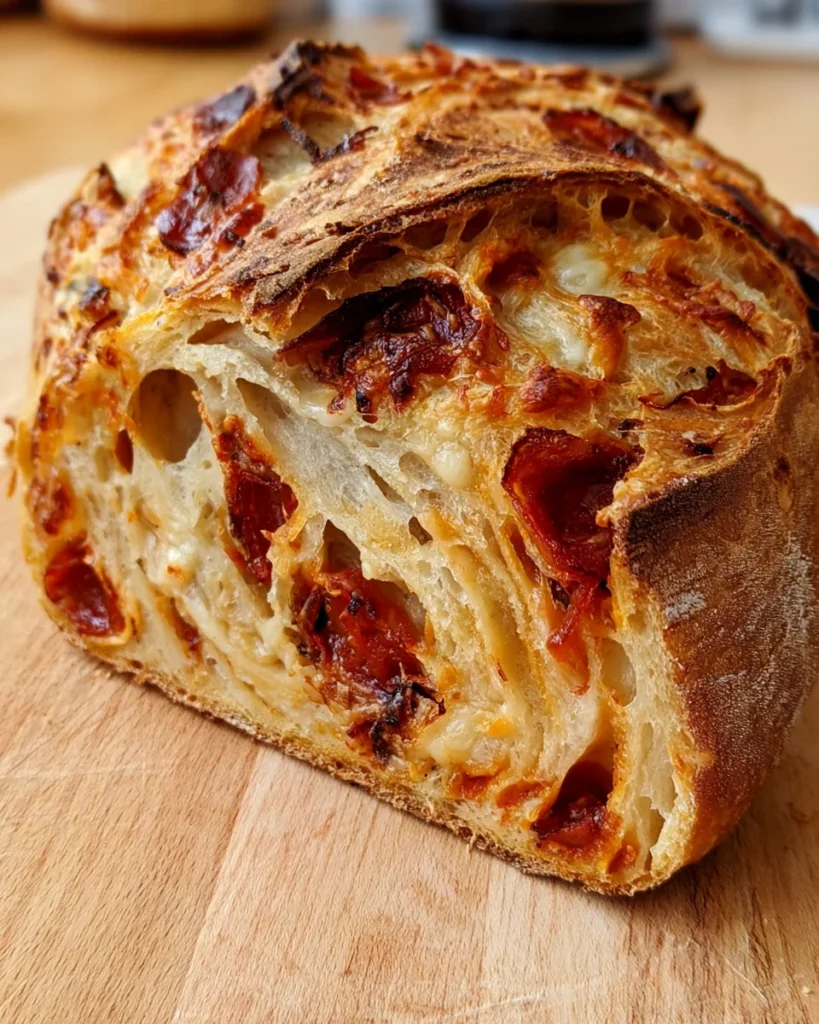
How to Make Sourdough Pizza Bread
Creating your own Sourdough Pizza Bread may sound daunting, but I assure you, it’s a rewarding process! Let’s break it down into straightforward steps. Remember, every step helps build flavor and texture, so curiosity is your ally here.
Step 1: Prepare Your Sourdough Starter
Before anything else, make sure your sourdough starter is alive and kicking! Feed it about 6-12 hours in advance. It should be bubbly and have doubled in size. This is crucial because an active starter contributes to the dough’s rise and tangy flavor. A healthy starter makes all the difference!
Step 2: Mix Ingredients
In a large mixing bowl, combine the warm water, your bubbly sourdough starter, salt, and pizza seasoning. Whisk it up until it looks well combined. Then, add the bread flour, mixing until you don’t see any dry flour. This forms the base of your dough! Now cover the bowl with a clean towel and let it rest for 20 minutes. This allows the flour to hydrate fully, which is essential for a good texture.
Step 3: Incorporate Cheese and Pepperoni
After the resting period, it’s time to get a little hands-on! Wet your hands, and take a quarter of the pepperoni and cheese, placing it into the dough’s center. Pull one side of the dough over the filling and continue this “stretch-and-fold” method. Keep incorporating the cheese and pepperoni until they’re evenly distributed. This technique works wonders for the breadth of flavors!
Step 4: Let the Dough Rise
Cover your dough again and let it rise until it doubles in size, which can take anywhere from 4 to 8 hours depending on the room temperature. Keep an eye on it; a good rise means your dough is healthy and ready for the next step! You want it puffed up and airy.
Step 5: Shape the Dough
Once your dough has risen, turn it out onto a lightly floured surface. Shape it into a round ball by tucking the edges underneath. This creates surface tension, which helps your bread rise beautifully. After shaping, let it rest for about 15 minutes. Resting is key—this is when the dough relaxes before the final shaping!
Step 6: Cold Proof Overnight
Now comes the magic of cold proofing! Transfer your shaped dough to a proofing basket that’s been dusted with rice flour. Cover it with a towel and let it chill in the fridge overnight. The longer fermentation at lower temperatures enhances flavor and gives your bread that irresistible sourdough tang!
Step 7: Preheat and Bake
When you’re ready to bake, preheat your oven to 450℉. Place a lidded Dutch oven inside to heat up. This creates a steam-filled environment that gives your bread a beautiful crust. Once the oven is hot, turn your dough onto parchment paper, score the top, and carefully place it in the Dutch oven together with two ice cubes for steaming. Cover it with the lid!
Step 8: Cool and Serve
Your bread will bake for 40 minutes covered. After that, remove the lid and bake for an additional 5-10 minutes until it’s golden brown. Once out, let it cool on a wire rack for at least 2-4 hours before slicing. This waiting time allows your loaf to finish cooking and enhances the texture. Trust me, the wait is worth it!
Tips for Success
- Make sure your sourdough starter is bubbly; it’s the lifeblood of your bread!
- Use a kitchen scale for accurate measurements; it makes a world of difference.
- Keep your dough warm during rising; a cozy environment promotes fermentation.
- Don’t rush the cooling process; slicing too soon can affect the texture.
- Experiment with fillings; substitute different cheeses or veggies for variety.

Equipment Needed
- Mixing Bowl: A large bowl for mixing your dough. Any big bowl will do!
- Measuring Scale: For precise measurements. A standard measuring cup works too.
- Proofing Basket: Helps shape your bread. A colander lined with a cloth works as a substitute.
- Dutch Oven: For baking. If you don’t have one, a baking sheet covered with a metal bowl can work.
- Parchment Paper: Helps with handling. You can use a silicone mat if you prefer.
Variations
- Vegetarian Delight: Swap out the pepperoni for sautéed mushrooms, bell peppers, or spinach for a fresh twist.
- Savory Herb Bread: Instead of pizza seasoning, use fresh herbs like rosemary or thyme for a fragrant option.
- Cheesy Garlic Bread: Add extra garlic powder and use a mix of different cheeses for a cheesy explosion.
- Spicy Kick: Add sliced jalapeños for those who like a little heat in their bread.
- Dairy-Free Option: Use plant-based cheeses and ensure your starter is free from dairy ingredients.
Serving Suggestions
- Pair with Marinara Sauce: Serve warm slices with a side of marinara for dipping.
- Fresh Salad: A crisp green salad makes a refreshing contrast.
- Wine Pairing: Enjoy with a light red or a sparkling wine for a perfect match.
- Presentation: Serve on a wooden board for that rustic touch!
FAQs about Sourdough Pizza Bread
Can I use all-purpose flour instead of bread flour?
Absolutely! While bread flour gives your Sourdough Pizza Bread a chewier texture, all-purpose flour will still yield delicious results. Just keep in mind that the crust may not be quite as crispy!
How do I know if my sourdough starter is active?
Your starter is ready when it’s bubbly and has doubled in size after feeding. It should have a pleasant, tangy smell. If it’s active, it will easily pass the “float test”—drop a spoonful in water, and if it floats, you’re good to go!
Can I add different fillings to the bread?
You can certainly get creative! For a unique twist, try incorporating different cheeses, slices of veggies, or even cooked sausage. Just make sure the total volume of added ingredients doesn’t overwhelm the dough!
How should I store leftover Sourdough Pizza Bread?
Once baked and cooled, wrap your bread in plastic wrap or foil and store it at room temperature for a couple of days. If you want it to last longer, consider freezing it, wrapped tightly, for up to three months.
What should I serve with Sourdough Pizza Bread?
This bread pairs beautifully with marinara sauce for dipping, a fresh green salad, or even your favorite soups! Serve it warm, and watch it disappear before your eyes!
Final Thoughts
Making Sourdough Pizza Bread is more than just baking; it’s an experience filled with flavors, aromas, and the joy of creating something special for those you love. This recipe brings the warmth of home and the irresistible taste of pizza straight to your table. Watching your family dive into a loaf that you made from scratch is rewarding. Each slice is a celebration of flavor and creativity, perfect for family dinners, gatherings, or a cozy night in. So, roll up your sleeves, embrace the process, and enjoy every delicious moment this bread brings into your life!
Print
Sourdough Pizza Bread
- Total Time: up to 20 hours
- Yield: 1 loaf 1x
- Diet: Vegetarian
Description
Sourdough Pizza Bread is a delicious and unique bread that combines the flavors of pizza with the tangy texture of sourdough. This recipe allows you to elevate your pizza game by making a flavorful, homemade bread that is perfect for any pizza lover.
Ingredients
- 1 ¼ cups + 2 tablespoons (325 grams) warm water (80-90℉)
- ½ cup (100 grams) active sourdough starter
- 3 ½ teaspoons (10 grams) Diamond Crystal Kosher Salt
- 1 tablespoon pizza seasoning (or 2 teaspoons dried oregano + 1 teaspoon garlic powder)
- 4 cups + 2 tablespoons (500 grams) bread flour
- 1 cup (125 grams) pepperoni slices cut into quarters
- ½ cup (50 grams) shredded low-moisture mozzarella cheese
- ¼ cup (20 grams) grated parmesan cheese
- Rice flour for dusting proofing basket
- 2 ice cubes for steam
Instructions
- Feed your sourdough starter 6-12 hours before starting to ensure it’s bubbly and active.
- In a large mixing bowl, whisk together warm water, sourdough starter, salt, and pizza seasoning. Add bread flour and mix until fully combined, then cover and let rest for 20 minutes.
- Lightly wet your hands and add ¼ of the pepperoni and cheese to the center of the dough. Perform a stretch-and-fold technique, adding and folding in the remaining pepperoni and cheese until fully incorporated.
- Cover the dough and let it rise until it doubles in size, which could take 4 to 8 hours.
- Turn the dough out onto a lightly floured surface and shape it into a round ball. Cover and let it rest for 15 minutes.
- Shape the dough again, transferring it to a proofing basket dusted with rice flour, and cold proof overnight in the refrigerator.
- Preheat your oven to 450℉ with a lidded Dutch oven inside.
- Turn the dough onto parchment paper, score the top, and carefully place it in the Dutch oven with 2 ice cubes for steam. Cover with the lid.
- Bake for 40 minutes with the lid on, then remove the lid and bake for an additional 5-10 minutes to achieve the desired crust color.
- Cool the bread on a wire rack for at least 2-4 hours before slicing and serving.
Notes
- Make sure the pepperoni slices are well-distributed in the dough.
- If using table salt or Morton’s brand, adjust the quantity accordingly.
- Tracking the rise with a straight-sided container helps monitor progress effectively.
- Prep Time: 12-16 hours (including cold proofing)
- Cook Time: 40-50 minutes
- Category: Bread
- Method: Baking
- Cuisine: Italian
Nutrition
- Serving Size: 1 slice
- Calories: 250
- Sugar: 1g
- Sodium: 450mg
- Fat: 10g
- Saturated Fat: 3g
- Unsaturated Fat: 7g
- Trans Fat: 0g
- Carbohydrates: 30g
- Fiber: 1g
- Protein: 8g
- Cholesterol: 15mg