No Bake Coconut Cream Pie: A Delightful Dessert Idea!

Introduction to No Bake Coconut Cream Pie
Ah, the magic of dessert that needs no baking! If you’re like me, you cherish the moments spent in the kitchen, but let’s be honest sometimes life gets hectic. That’s where this No Bake Coconut Cream Pie comes in. Packed with creamy coconut goodness, it’s an effortless treat that’s sure to impress family and friends alike. Whether you need a quick dessert for a potluck or a sweet ending to a family dinner, this pie is a delightful solution for any occasion, and it’s a breeze to whip up!
Why You’ll Love This No Bake Coconut Cream Pie
This No Bake Coconut Cream Pie is a true lifesaver for busy days. Imagine a dessert that’s not just quick to prepare, but also bursts with rich, tropical flavors! You’ll love how effortlessly it fits into your schedule. With no baking required, clean-up is a breeze, leaving you more time to savor the sweet moments with your loved ones. Plus, the creamy texture will have everyone coming back for seconds!
Ingredients for No Bake Coconut Cream Pie
Gathering the right ingredients is half the fun! Here’s what you’ll need to create this creamy delight:
- Prepared pie crust: You can go for a store-bought option or whip up your favorite homemade crust. Either way, it serves as the delicious base for this pie.
- Sweetened condensed milk: This creamy, sweet liquid adds rich flavor and texture to the filling. It’s the secret behind the pie’s luxurious taste!
- Cold milk: Regular or plant-based, this helps blend the filling ingredients smoothly. Use coconut milk for an extra punch of flavor!
- Instant pudding mix: Choose either coconut cream or vanilla. Instant pudding is key for that thick, velvety texture; skip the cook-and-serve kind!
- Shredded sweetened coconut: This introduces delightful texture and coconut flavor. Feel free to adjust the quantity to suit your taste.
- Cool Whip or whipped topping: This fluffy, light topping makes the filling airy and smooth. Whipped cream works well too, just ensure it’s stabilized!
- Toasted coconut (optional): A lovely garnish that adds both visual appeal and extra crunch. Who doesn’t love a little texture contrast?
For exact measurements, check the bottom of the article where you can also find a printable version. Happy cooking!
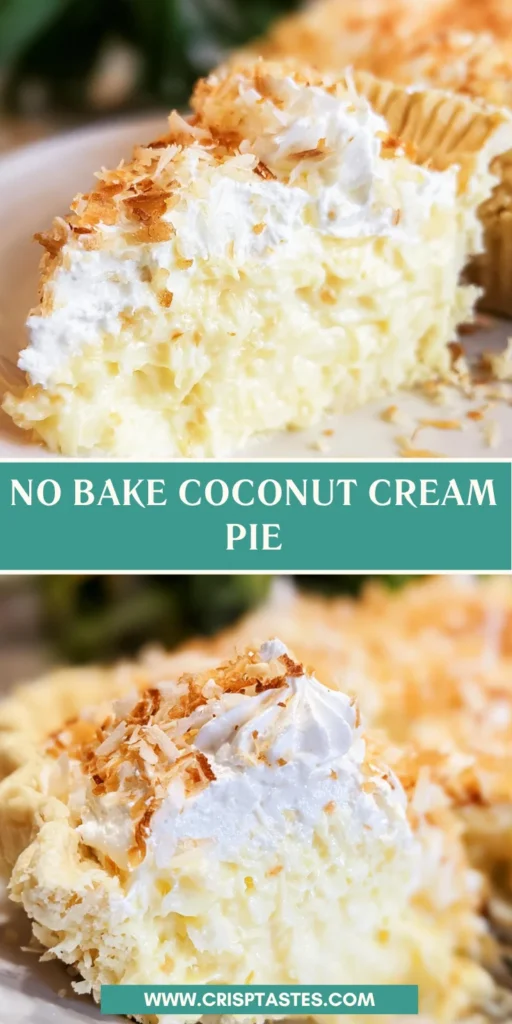
How to Make No Bake Coconut Cream Pie
Ready to create your own No Bake Coconut Cream Pie? Trust me, it’s simpler than you might think! Just follow these easy steps, and you’ll have a sensational dessert to enjoy and share.
Step 1: Prepare the Pie Crust
Start with your prepared pie crust. If you’re using a store-bought one, simply unroll it and place it into a 9-inch deep dish pie plate. Make sure to gently press it against the bottom and sides. Feeling a bit fancy? Crimp the edges using your fingers or a fork for a beautiful finish!
Step 2: Pre-bake the Pie Crust
Next, we’ll give that crust a little love before filling it up. Line the crust with foil or parchment paper, then fill it with pie weights or dried beans. This prevents it from puffing up while baking. Pop it into a preheated oven at 425 degrees and bake for about 10-12 minutes. You want the edges to turn a lovely golden brown!
Step 3: Cool the Crust
After baking, it’s crucial to let the pie crust cool completely. I can’t stress this enough! If you don’t, your filling will melt rather than set, and that wouldn’t be good. Just let it sit at room temperature for a while, and sip a cup of tea while you wait. Patience pays off in dessert land!
Step 4: Make the Filling
Now for the fun part—making the filling! In a large mixing bowl, whisk together the sweetened condensed milk, cold milk, pudding mix, and shredded coconut. You want a smooth mixture full of coconut flavor. Make sure that everything is well combined for the best texture!
Step 5: Combine and Fill
Here comes the airy magic! Gently fold in the Cool Whip or whipped topping into your coconut mixture. This gives it that fluffy, creamy texture that’s a delight to eat. Once combined, carefully pour the filling into your cooled crust. Don’t worry if it looks a bit full—just mound it up in the center!
Step 6: Chill and Set
Your pie needs a little TLC now. Cover the pie with plastic wrap and pop it into the refrigerator. Allow it to chill for at least 2 hours, or until it’s set. This is when the flavors meld together beautifully. Just think—soon you’ll be diving into creamy coconut goodness!
Step 7: Garnish and Serve
Once your pie is set, it’s time to get creative with garnishing! Top it with a swirl of whipped cream and sprinkle some toasted coconut on top for that impressive finishing touch. Slice it up, serve it with a smile, and watch the delight on everyone’s faces. You’ve earned it!
Tips for Success
- Always use instant pudding for the best texture in your filling.
- For a creamier pie, try substituting regular milk with coconut milk. It deepens the coconut flavor!
- Make it a day ahead and let the pie chill overnight; the flavors develop beautifully.
- When garnishing, toast coconut in a dry pan until golden for a lovely crunch.
- Serve chilled for the best taste and texture experience!
Equipment Needed
- 9-inch deep dish pie plate: Essential for holding your delicious no bake creation. A glass or ceramic one helps check the crust’s browning.
- Mixing bowls: Use at least one large bowl for mixing the filling and another smaller one for whisking. Any standard set will do.
- Whisk: A simple whisk is all you need to achieve that smooth filling.
- Measuring cups: Necessary for accurate ingredient quantities. If you don’t have a set, improvise with spoons!
Variations on No Bake Coconut Cream Pie
- Chocolate Coconut Cream Pie: Add a layer of chocolate ganache or mix in cocoa powder with the pudding for a deliciously rich twist.
- Fruit-Filled Coconut Cream Pie: Incorporate fresh fruits like pineapple or mango into the filling for a tropical explosion of flavors.
- Dairy-Free Option: Use coconut milk and a dairy-free whipped topping to cater to dairy-free diets without sacrificing taste!
- Low Sugar Version: Substitute sweetened condensed milk with a low-sugar alternative. You can also use sugar-free pudding mix for a guilt-free treat.
- Lime Coconut Cream Pie: Add lime zest and juice for a citrusy kick that balances the sweetness beautifully.
Serving Suggestions for No Bake Coconut Cream Pie
- Fresh Berries: Serve with a side of mixed berries like strawberries, raspberries, or blueberries for a pop of color and freshness.
- Iced Tea: Pair with a refreshing glass of iced tea, sweetened with just a touch of sugar for a perfect complement.
- Elegant Presentation: Use a decorative pie server and plate for a stunning table display that impresses guests.
- Mint Leaves: Garnish each slice with a sprig of fresh mint for an aromatic touch.
FAQs about No Bake Coconut Cream Pie
Got questions about my No Bake Coconut Cream Pie? You’re in the right place! Here are some common queries that might pop into your mind, answered to help you on your delicious journey!
Can I use other flavors of pudding mix?
Absolutely! While coconut and vanilla are fantastic, feel free to experiment with chocolate or even butterscotch for a fun twist on this beloved dessert. Just remember, the texture may vary slightly!
How long will this pie stay fresh?
Your pie can be stored in the refrigerator for up to four days. Just cover it to keep it fresh. Although, let’s be honest, it probably won’t last that long!
Can I freeze No Bake Coconut Cream Pie?
Yes, you can freeze it! Just make sure it’s well-wrapped to avoid ice crystals forming. When ready to enjoy, let it thaw in the fridge for several hours before serving. It’s like a mini vacation for your sweet treat!
What should I do if my filling doesn’t set?
If you find that the filling isn’t firming up, it could be due to using non-instant pudding mix. Instant pudding helps to create the right texture. However, placing it back in the refrigerator for a bit longer often does the trick.
Can I make this pie dairy-free?
Definitely! Use coconut milk in place of regular milk and opt for a dairy-free whipped topping. Your No Bake Coconut Cream Pie will still have that luscious coconut flavor everyone loves!
Final Thoughts
Creating this No Bake Coconut Cream Pie is more than just making a dessert; it’s about embracing the joy of cooking without the fuss! Every bite is like a mini-vacation to the tropics, filled with refreshing coconut bliss. Whether you’re sharing it with family during a cozy dinner or serving it at a summer gathering, this pie is sure to spark smiles and sweet memories. And the best part? It’s a stress-free recipe that will make you feel like a culinary superstar without spending hours in the kitchen. Dive into this creamy delight and savor every moment!
Print
No Bake Coconut Cream Pie
- Total Time: 2 hours 32 minutes
- Yield: 8 servings 1x
- Diet: Vegetarian
Description
A creamy and delightful No Bake Coconut Cream Pie that is easy to make and perfect for any occasion.
Ingredients
- 1 9-inch prepared refrigerated pie crust or your favorite pie crust recipe
- 14 oz. can sweetened condensed milk
- 1 cup cold milk
- 2 – 3.4 oz. boxes instant coconut cream or vanilla pudding mix
- 1 1/2 cups shredded sweetened coconut
- 8 oz. container Cool Whip or whipped topping, thawed
- 1 cup toasted coconut (optional garnish)
Instructions
- Arrange pie crust in a 9-inch deep dish pie plate, and crimp or scallop the edges.
- Line the pie crust with foil or parchment paper, and fill with pie weights or dried beans.
- Bake at 425 degrees for 10-12 minutes, or until edges are browned.
- Remove from heat, carefully remove parchment and pie weights, and cool completely.
- Meanwhile, prepare filling.
- In a large bowl, whisk together sweetened condensed milk, milk, pudding mix, and coconut.
- Fold in whipped topping.
- Pour into prepared pie crust. The pie crust will be VERY full, but it will all fit if you just keep building it up in the center. Careful not to let the filling seep over the edges of the crust.
- Refrigerate til set, at least 2 hours.
- If desired, garnish with additional whipped cream and toasted coconut. Cut and serve.
Notes
- Ensure you use instant pudding mix for the best texture.
- For a richer coconut flavor, consider using coconut milk in place of regular milk.
- Can be made a day ahead for convenience.
- Prep Time: 20 minutes
- Cook Time: 12 minutes
- Category: Dessert
- Method: No Bake
- Cuisine: American
Nutrition
- Serving Size: 1 slice
- Calories: 350
- Sugar: 25g
- Sodium: 300mg
- Fat: 18g
- Saturated Fat: 10g
- Unsaturated Fat: 6g
- Trans Fat: 0g
- Carbohydrates: 45g
- Fiber: 1g
- Protein: 4g
- Cholesterol: 30mg