Chocolate Peanut Butter Rice Krispie Cups

Introduction to Chocolate Peanut Butter Rice Krispie Cups
There’s something undeniably comforting about the combination of chocolate and peanut butter, isn’t there? When life gets hectic, I find myself reaching for quick treats that can satisfy sweet cravings without all the fuss. Enter Chocolate Peanut Butter Rice Krispie Cups—my go-to recipe for a simple, yet delightful dessert. These little cups are perfect for busy days when you’re seeking a quick solution for the family or want to impress loved ones. With just a handful of ingredients and no baking required, you’ll have a deliciously sweet treat ready in no time!
Why You’ll Love This Chocolate Peanut Butter Rice Krispie Cups
These Chocolate Peanut Butter Rice Krispie Cups are a dream come true for anyone juggling a busy life! They come together in a flash, needing just 10 minutes of prep time. The taste? Heavenly! The balance of crispy, creamy, and sweet will have your taste buds dancing. Plus, they’re no-bake, making cleanup a breeze. You can enjoy homemade goodness without the hassle. What’s not to love?
Ingredients for Chocolate Peanut Butter Rice Krispie Cups
Gathering the ingredients for these delightful Chocolate Peanut Butter Rice Krispie Cups is easy and enjoyable. You’ll need just a few pantry staples, each bringing its own unique flavor and texture.
- Creamy peanut butter: This is the star of the show! It adds richness and a nutty flavor. If you’re feeling adventurous, chunky peanut butter can offer a delightful crunch.
- Honey: A natural sweetener that binds everything together while adding a touch of floral sweetness. Maple syrup is a tasty alternative if you want to switch it up.
- Salt: A pinch of salt enhances the flavors, balancing the sweetness. Don’t skip it; it truly makes a difference!
- Rice Krispies cereal: These crispy little bites give the cups their delightful crunch. Any crispy rice cereal will work in a pinch, so feel free to use what you have.
- Chocolate chips: Whether you choose semi-sweet, milk, or dark chocolate, the melted chocolate topping elevates these cups to another level of yumminess!
You’ll find exact measurements and additional details for each ingredient lower in the article for your convenience.

How to Make Chocolate Peanut Butter Rice Krispie Cups
Now that we have our ingredients sorted, it’s time to create some magic in the kitchen! Making these Chocolate Peanut Butter Rice Krispie Cups is straightforward, and I promise you’ll have fun every step of the way. So, let’s get started!
Step 1: Prepare the Muffin Tin
First things first, you’ll want to prepare your muffin tin. Line each cup with paper liners for easy removal. If you’re out of liners, just give the tin a quick spritz with nonstick spray. This little step is a lifesaver! I once forgot to line my tins, and let’s just say, the struggle was real during cleanup!
Step 2: Melt the Peanut Butter Mixture
Next up, let’s melt our peanut butter mixture. Place your creamy peanut butter, honey, and salt in a small saucepan over low heat. Stir constantly to ensure it blends perfectly and doesn’t burn. Trust me; low heat is key! If you like a bit of flair, try adding a splash of vanilla extract for a lovely aroma.
Step 3: Combine with Rice Krispies
Once your mixture is smooth, pour it over the Rice Krispies in a large bowl. Grab a spatula and fold the cereal gently until all pieces are coated. This is where the magic happens! Make sure every little rice crisp gets its fair share of that sweet, gooey goodness for the best texture.
Step 4: Fill the Muffin Cups
Now it’s time to fill those muffin cups! Spoon the mixture into each lined cup, filling them about two-thirds full. Here’s a tip: press down firmly with the back of your spoon. This isn’t the moment for hesitation; you want these cups to stick together and hold their shape!
Step 5: Prepare the Chocolate Topping
Let’s talk about that dreamy chocolate topping! Melt the chocolate chips in the microwave, working in 20-30 second intervals. Stir in between to keep it smooth and avoid those pesky burnt bits. If you ever find that your chocolate seems too thick, a dash of coconut oil can come to the rescue for a silkier finish!
Step 6: Chill and Set
Finally, it’s time for the chilling part. Place your filled cups in the refrigerator for about 30 minutes, or until the chocolate has firmed up. This chilling process not only helps them set but also enhances the flavor—trust me, they’re best served chilled. When you’re ready, dig in or plate them up for a gathering!
Tips for Success
- Use fresh ingredients for the best flavor; old peanut butter can taste bland.
- Experiment with different chocolate options to suit your taste.
- Make a double batch—trust me, they’ll disappear quickly!
- Don’t rush the chilling step; it makes a world of difference in texture.
- Try adding nuts or dried fruit for a fun twist!
Equipment Needed for Chocolate Peanut Butter Rice Krispie Cups
- Muffin tin: Essential for shaping your cups; you can also use silicone molds for easy removal.
- Spatula: Perfect for mixing and folding ingredients; a wooden spoon can also do the trick.
- Microwave-safe bowl: Ideal for melting chocolate; if in a pinch, any heatproof dish will suffice.
- Measuring cups: Handy for ingredient accuracy; feel free to eyeball it if you’re adventurous!
Variations of Chocolate Peanut Butter Rice Krispie Cups
- Nut Butter Swap: Replace peanut butter with almond or cashew butter for a unique twist!
- Add-ins: Toss in some mini marshmallows, chopped nuts, or dried fruit for extra texture and flavor.
- Flavor Variations: Mix in a teaspoon of cocoa powder for a richer chocolate flavor, or a splash of vanilla extract for added depth.
- Dairy-Free Option: Use dairy-free chocolate chips for a vegan-friendly treat that everyone can enjoy.
- Gluten-Free Alternative: Ensure your Rice Krispies are labeled gluten-free to meet dietary needs.
Serving Suggestions for Chocolate Peanut Butter Rice Krispie Cups
- Pair these cups with a tall glass of cold milk for a classic combination.
- Serve alongside fresh fruit, like banana slices or strawberries, for a refreshing contrast.
- For an elegant touch, drizzle additional melted chocolate over the cups before serving.
- Consider plating them on a colorful dessert platter for gatherings.
- These cups are also delightful crumbled over yogurt for a fun twist!
FAQs about Chocolate Peanut Butter Rice Krispie Cups
Can I make these Chocolate Peanut Butter Rice Krispie Cups ahead of time?
Absolutely! In fact, they store wonderfully in an airtight container in the refrigerator for up to a week. Making them ahead is perfect for busy days!
What can I use instead of Rice Krispies?
If you’re out of Rice Krispies, no worries! Any crispy rice cereal will work, or even granola can give you a different but tasty crunch.
Can I freeze Chocolate Peanut Butter Rice Krispie Cups?
Yes, you can! Just be sure to wrap each cup tightly in plastic wrap and store them in a freezer-safe container. They’ll be good for about a month.
How can I make these cups more decadent?
For an extra layer of indulgence, try adding a layer of caramel sauce before the chocolate topping. It adds a delightful twist that’s simply irresistible!
Are there any allergy-friendly variations?
Definitely! You can use sunflower seed butter instead of peanut butter for a nut-free option. Just ensure your ingredients are free from allergens to cater to everyone’s needs.
Final Thoughts
Making Chocolate Peanut Butter Rice Krispie Cups isn’t just about whipping up a quick treat; it’s about creating moments of joy in our busy lives. With their delightful combination of flavors and satisfying crunch, these little cups bring a smile to everyone’s face, including my own! I love how simple they are to make, yet they feel like a special indulgence. Whether it’s savoring them after a long day or sharing them with friends, these treats have a knack for making ordinary moments feel extraordinary. Trust me, you’ll want to keep this recipe in your culinary arsenal!
Print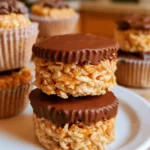
Chocolate Peanut Butter Rice Krispie Cups
- Total Time: 35 minutes
- Yield: 12 cups 1x
- Diet: Vegetarian
Description
A quick and delicious treat combining chocolate and peanut butter with crispy rice cereal.
Ingredients
- 1 cup creamy peanut butter (chunky works too)
- 6 tablespoons honey
- 1 pinch salt
- 3 cups Rice Krispies cereal (or any crispy rice cereal)
- 2 cups chocolate chips, melted (semi-sweet, milk, or dark)
Instructions
- Line a muffin tin with liners or lightly spray with nonstick spray.
- In a small saucepan over medium-low heat, melt peanut butter, honey, and salt until smooth.
- Pour the warm peanut butter mixture over the Rice Krispies in a bowl and stir until evenly coated.
- Spoon mixture into muffin cups, filling about ⅔ full. Press down firmly so they hold together.
- Microwave chocolate chips in 20-30 second intervals, stirring between, until smooth.
- Spoon melted chocolate over each cup and smooth the tops.
- Refrigerate for 30 minutes, or until chocolate is firm. Serve chilled for best texture.
Notes
- Store leftovers in an airtight container in the refrigerator.
- Feel free to substitute almond butter for a different flavor.
- Prep Time: 10 minutes
- Cook Time: 5 minutes
- Category: Dessert
- Method: No-bake
- Cuisine: American
Nutrition
- Serving Size: 1 cup
- Calories: 150
- Sugar: 10g
- Sodium: 100mg
- Fat: 7g
- Saturated Fat: 3.5g
- Unsaturated Fat: 3.5g
- Trans Fat: 0g
- Carbohydrates: 18g
- Fiber: 1g
- Protein: 4g
- Cholesterol: 0mg